Create Your First Task
Once opened, you’ll land on the Task page. It’s a clean space designed to turn your ideas into action. Let’s break down what you see.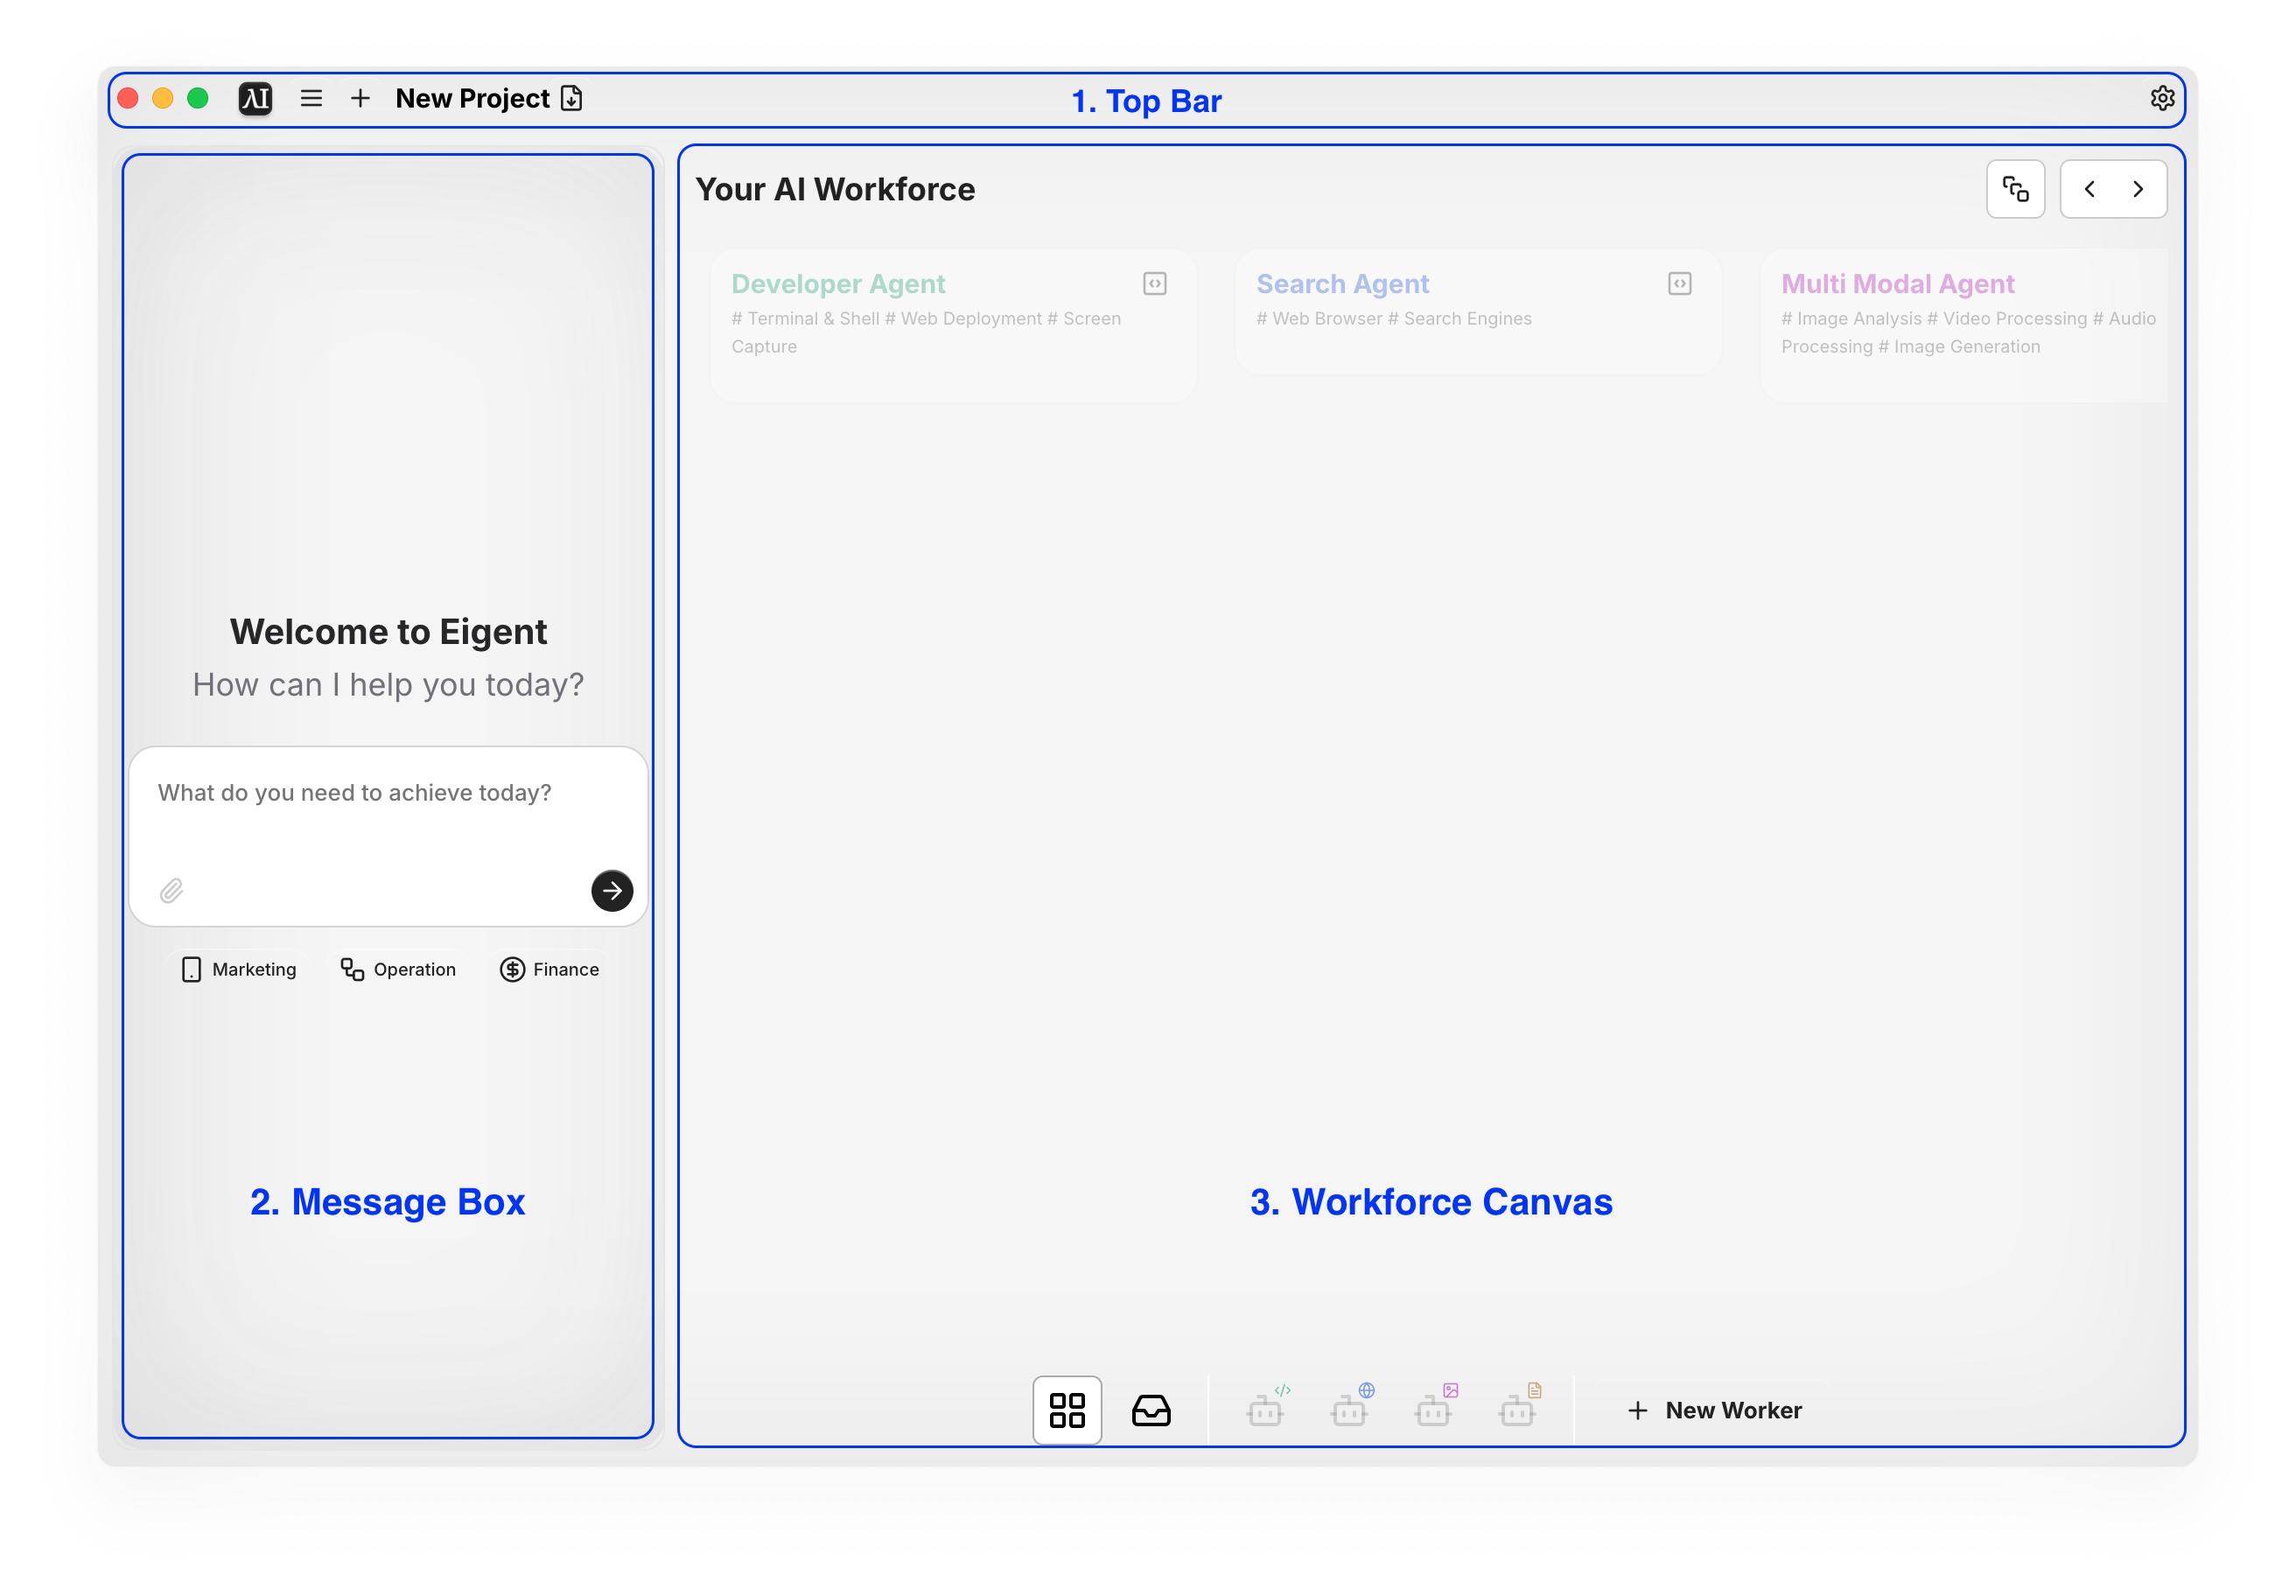
The Top Bar
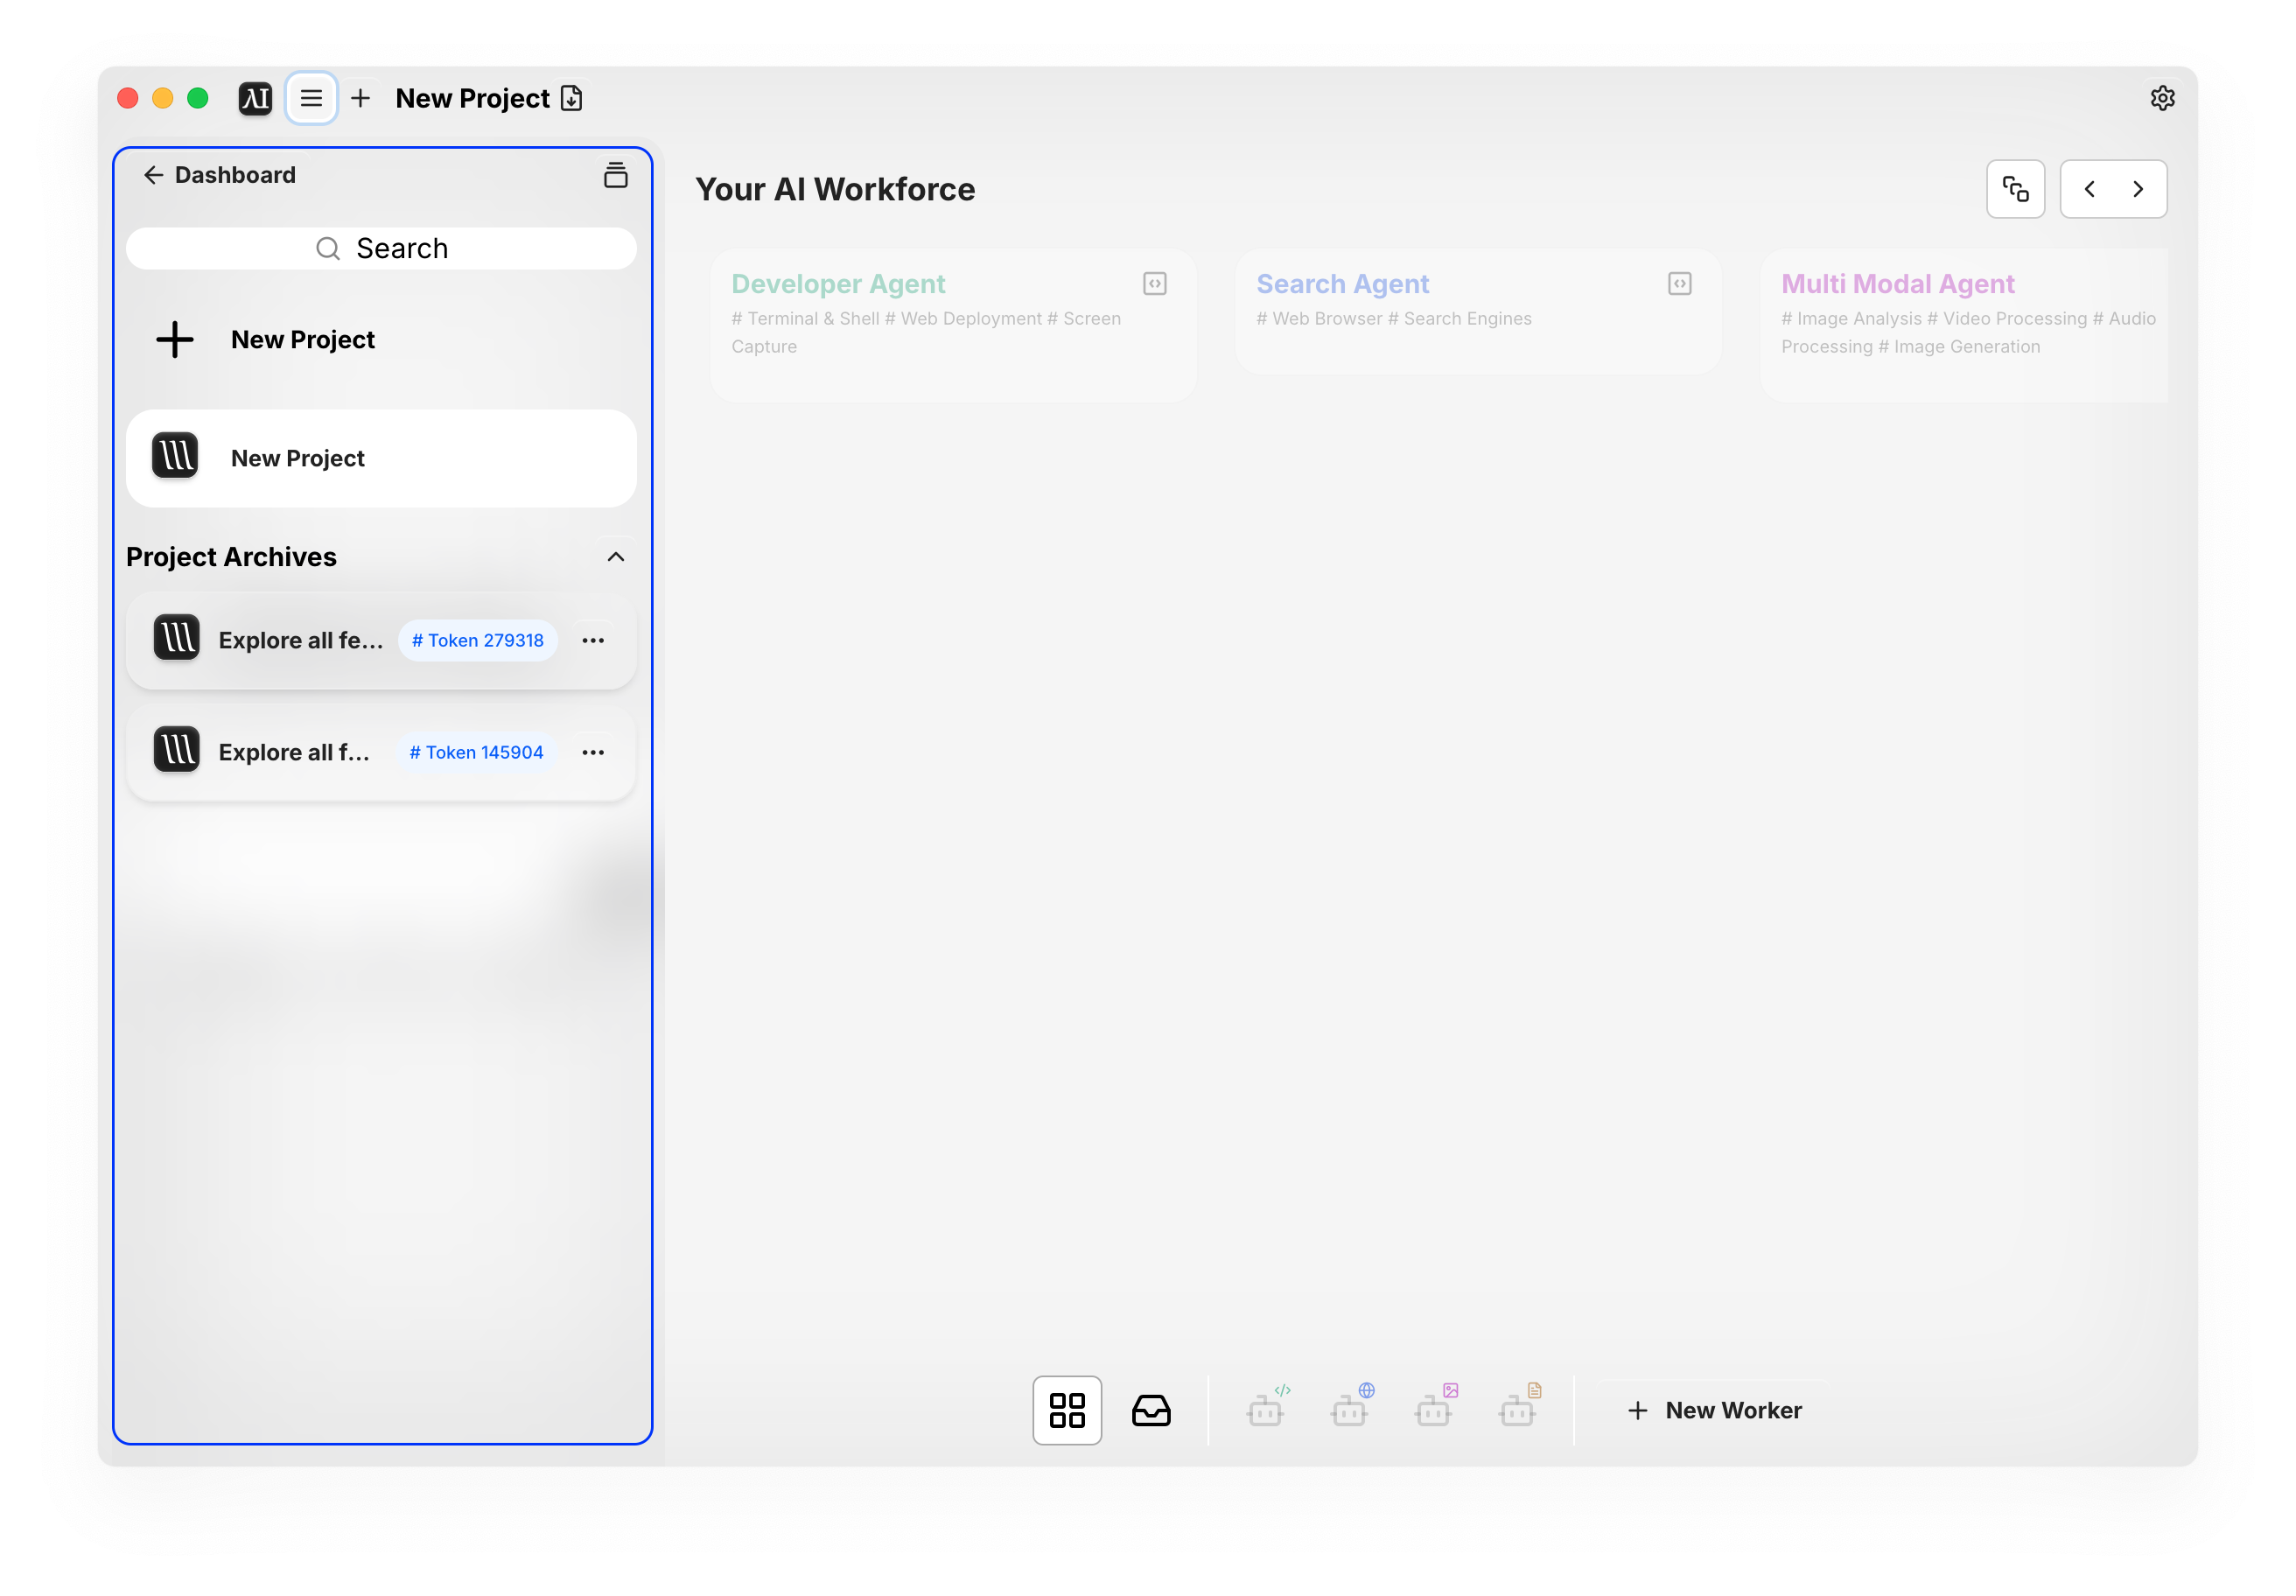
At the very top of the window is your main navigation bar. You’ll access:- Dashboard: your home base for creating and viewing History and Ongoing tasks.
- Project Archives: a detailed log of all your past tasks, including the token usage.
- Ongoing Tasks
- Settings: where you can configure the app to your liking.
The Main View
Your workspace is split into two panels: Message Box (Left): where you’ll chat with your AI workforce to start a job.-
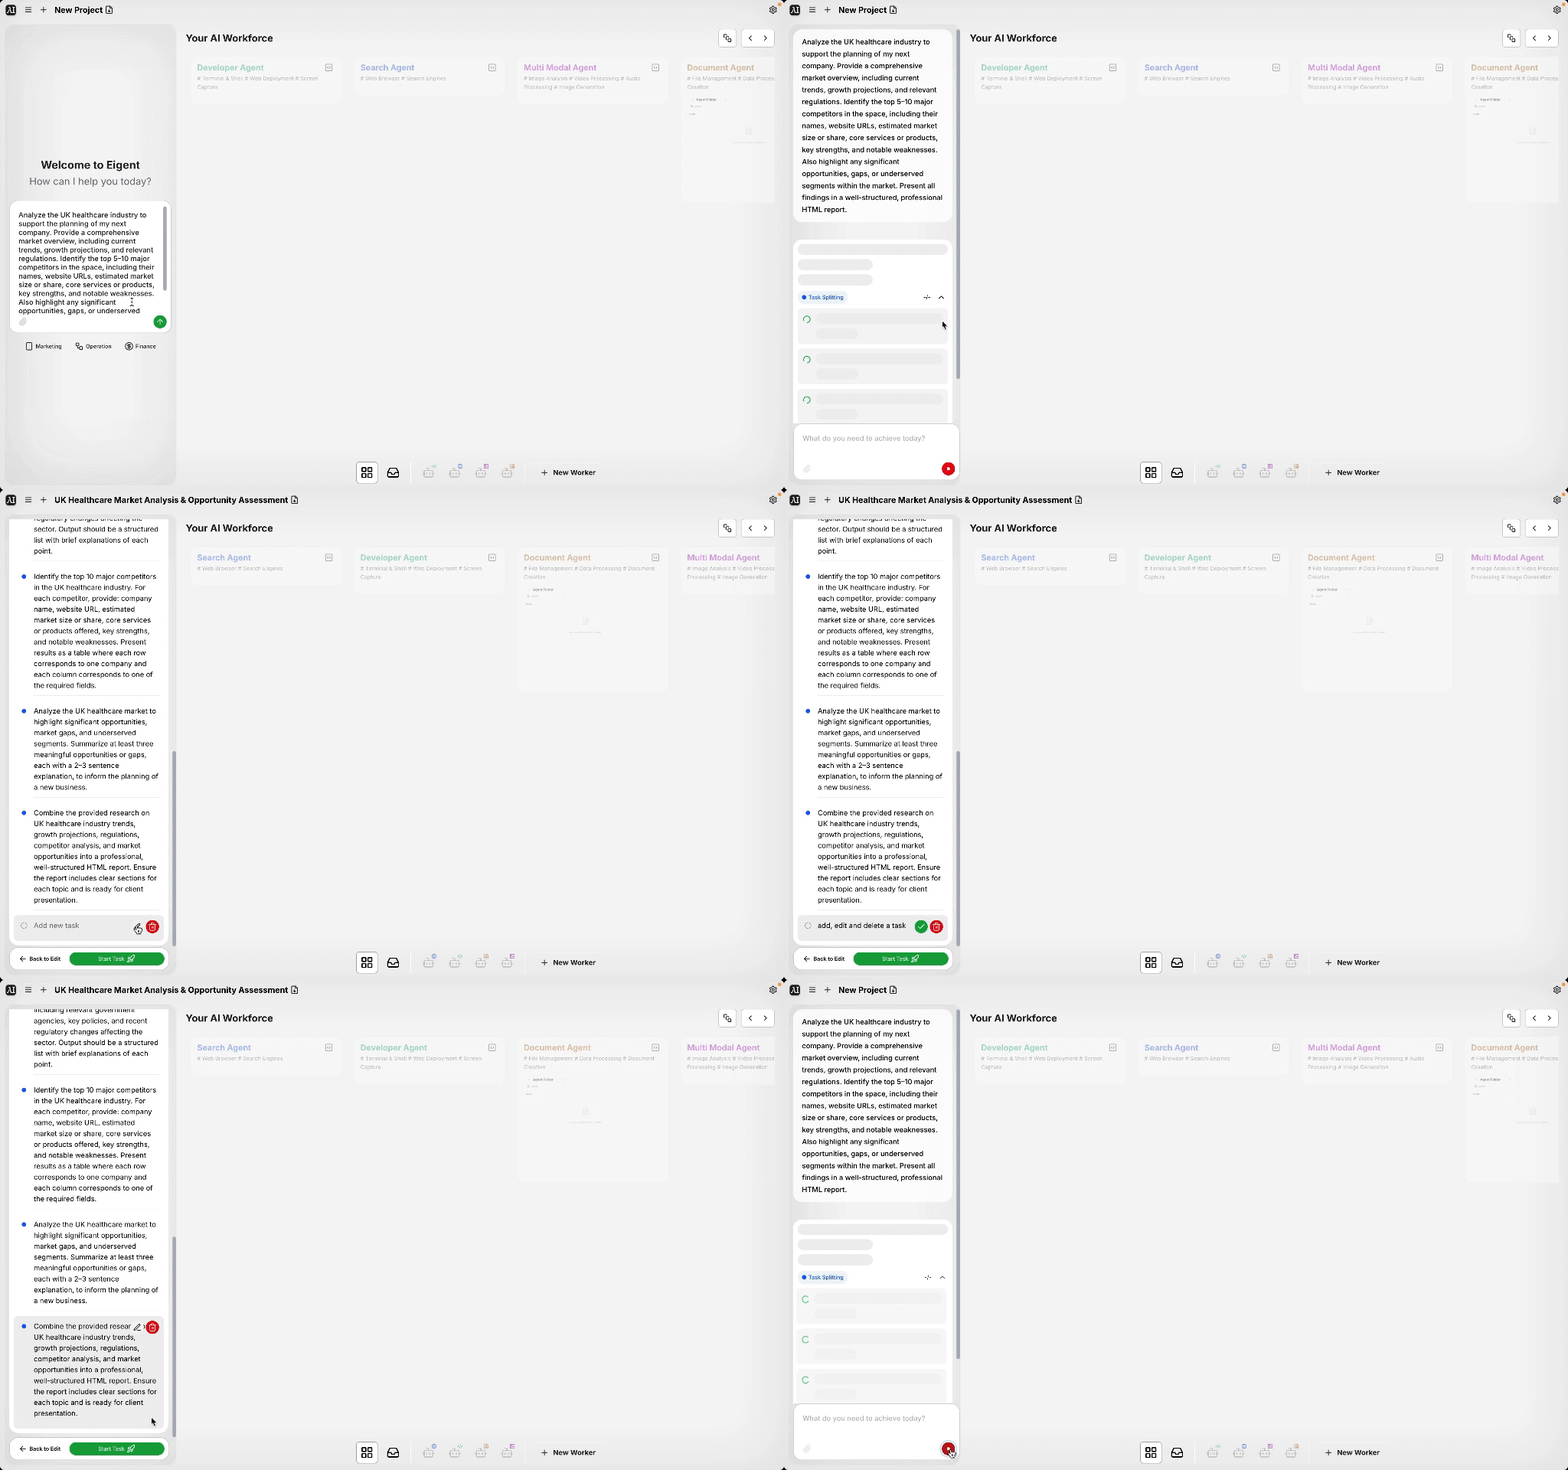
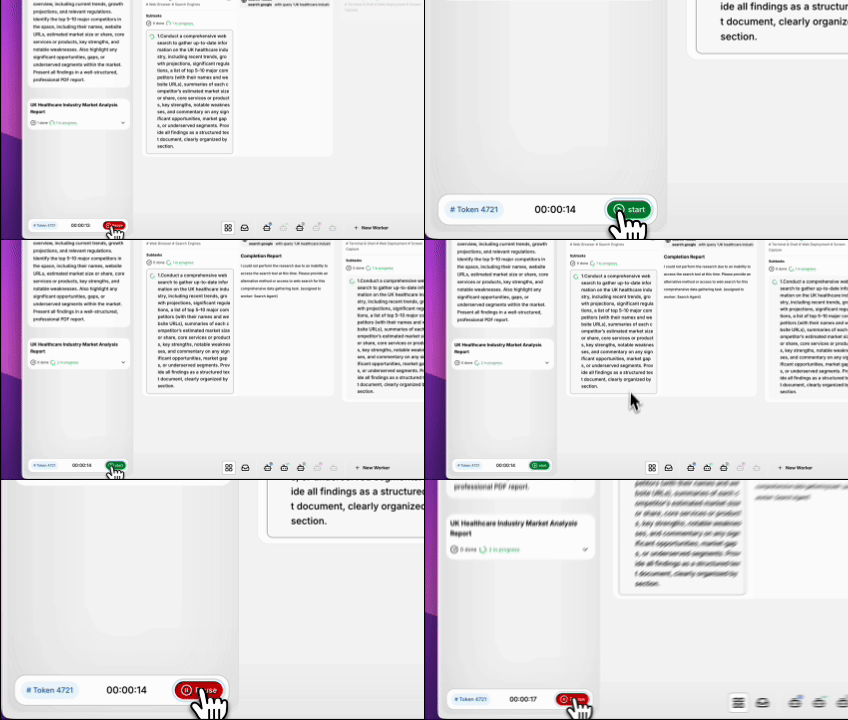
Before running the task, you can Add, Edit, or Delete any subtask or Back to Edit your request, then resume. When tasks complete, you can use Replay to re-run the flow.
-
You can pause anytime—hit Pause, edit via Back to Edit, then resume. When tasks complete, use Replay to re-run the flow.
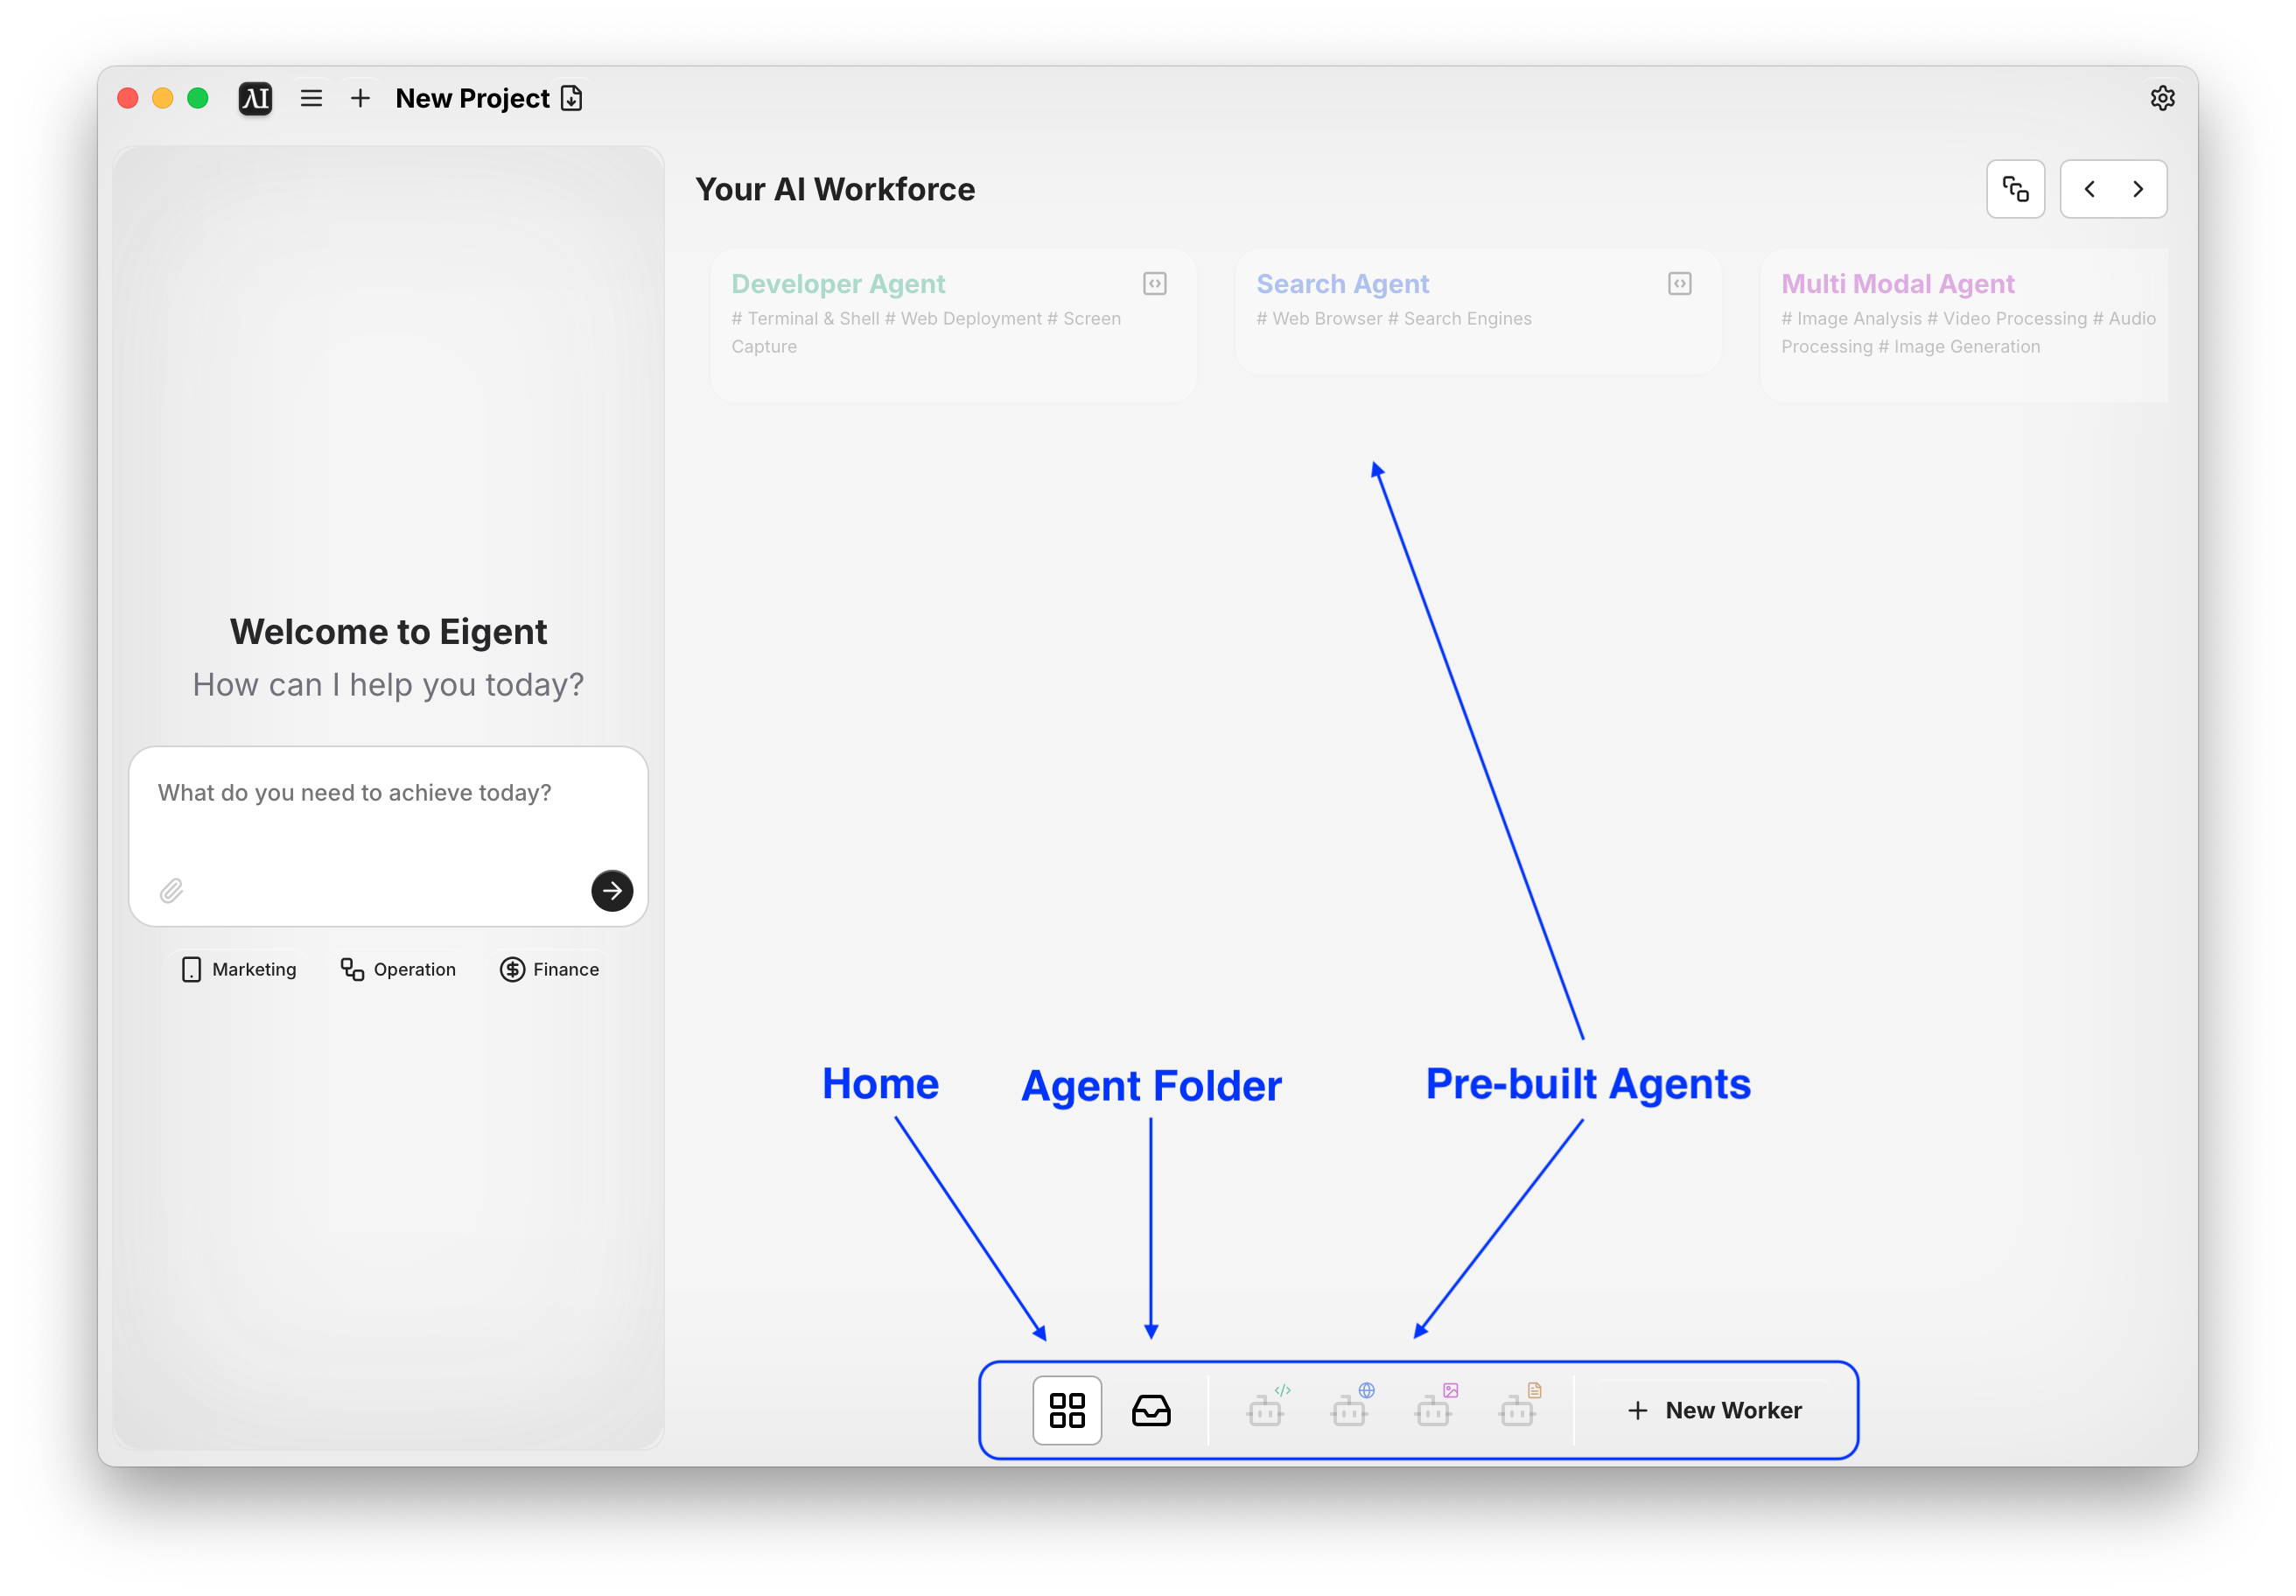
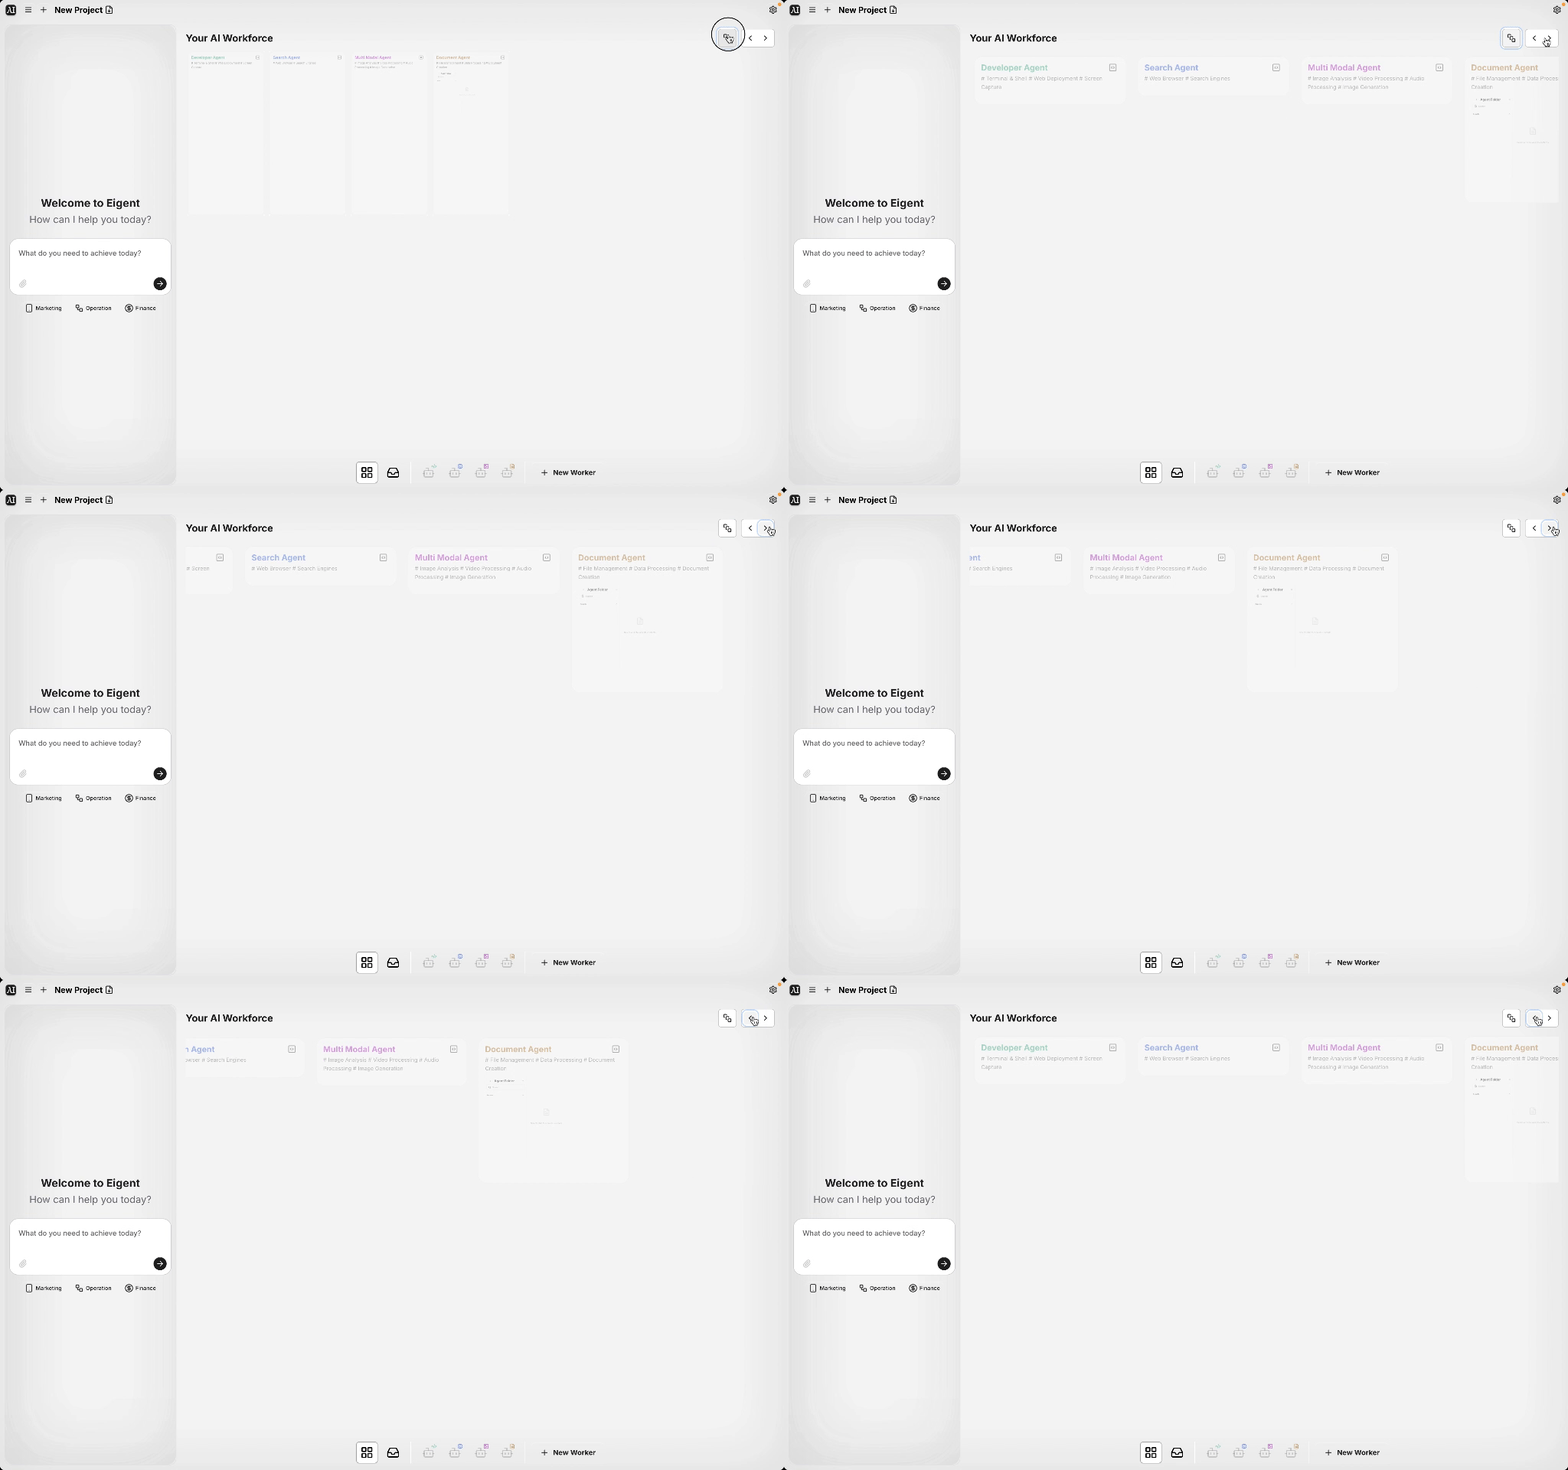
- Before a Task: You’ll see your pre-built agents and and their tools. You can also click + New Worker to add your own. These workers will always be on standby for your task.
- During a Task: The Canvas shows the live status of all subtasks (
Done / In Progress / Unfinished). Click any subtask to view detailed logs (reasoning steps, tool calls, results). More on this below.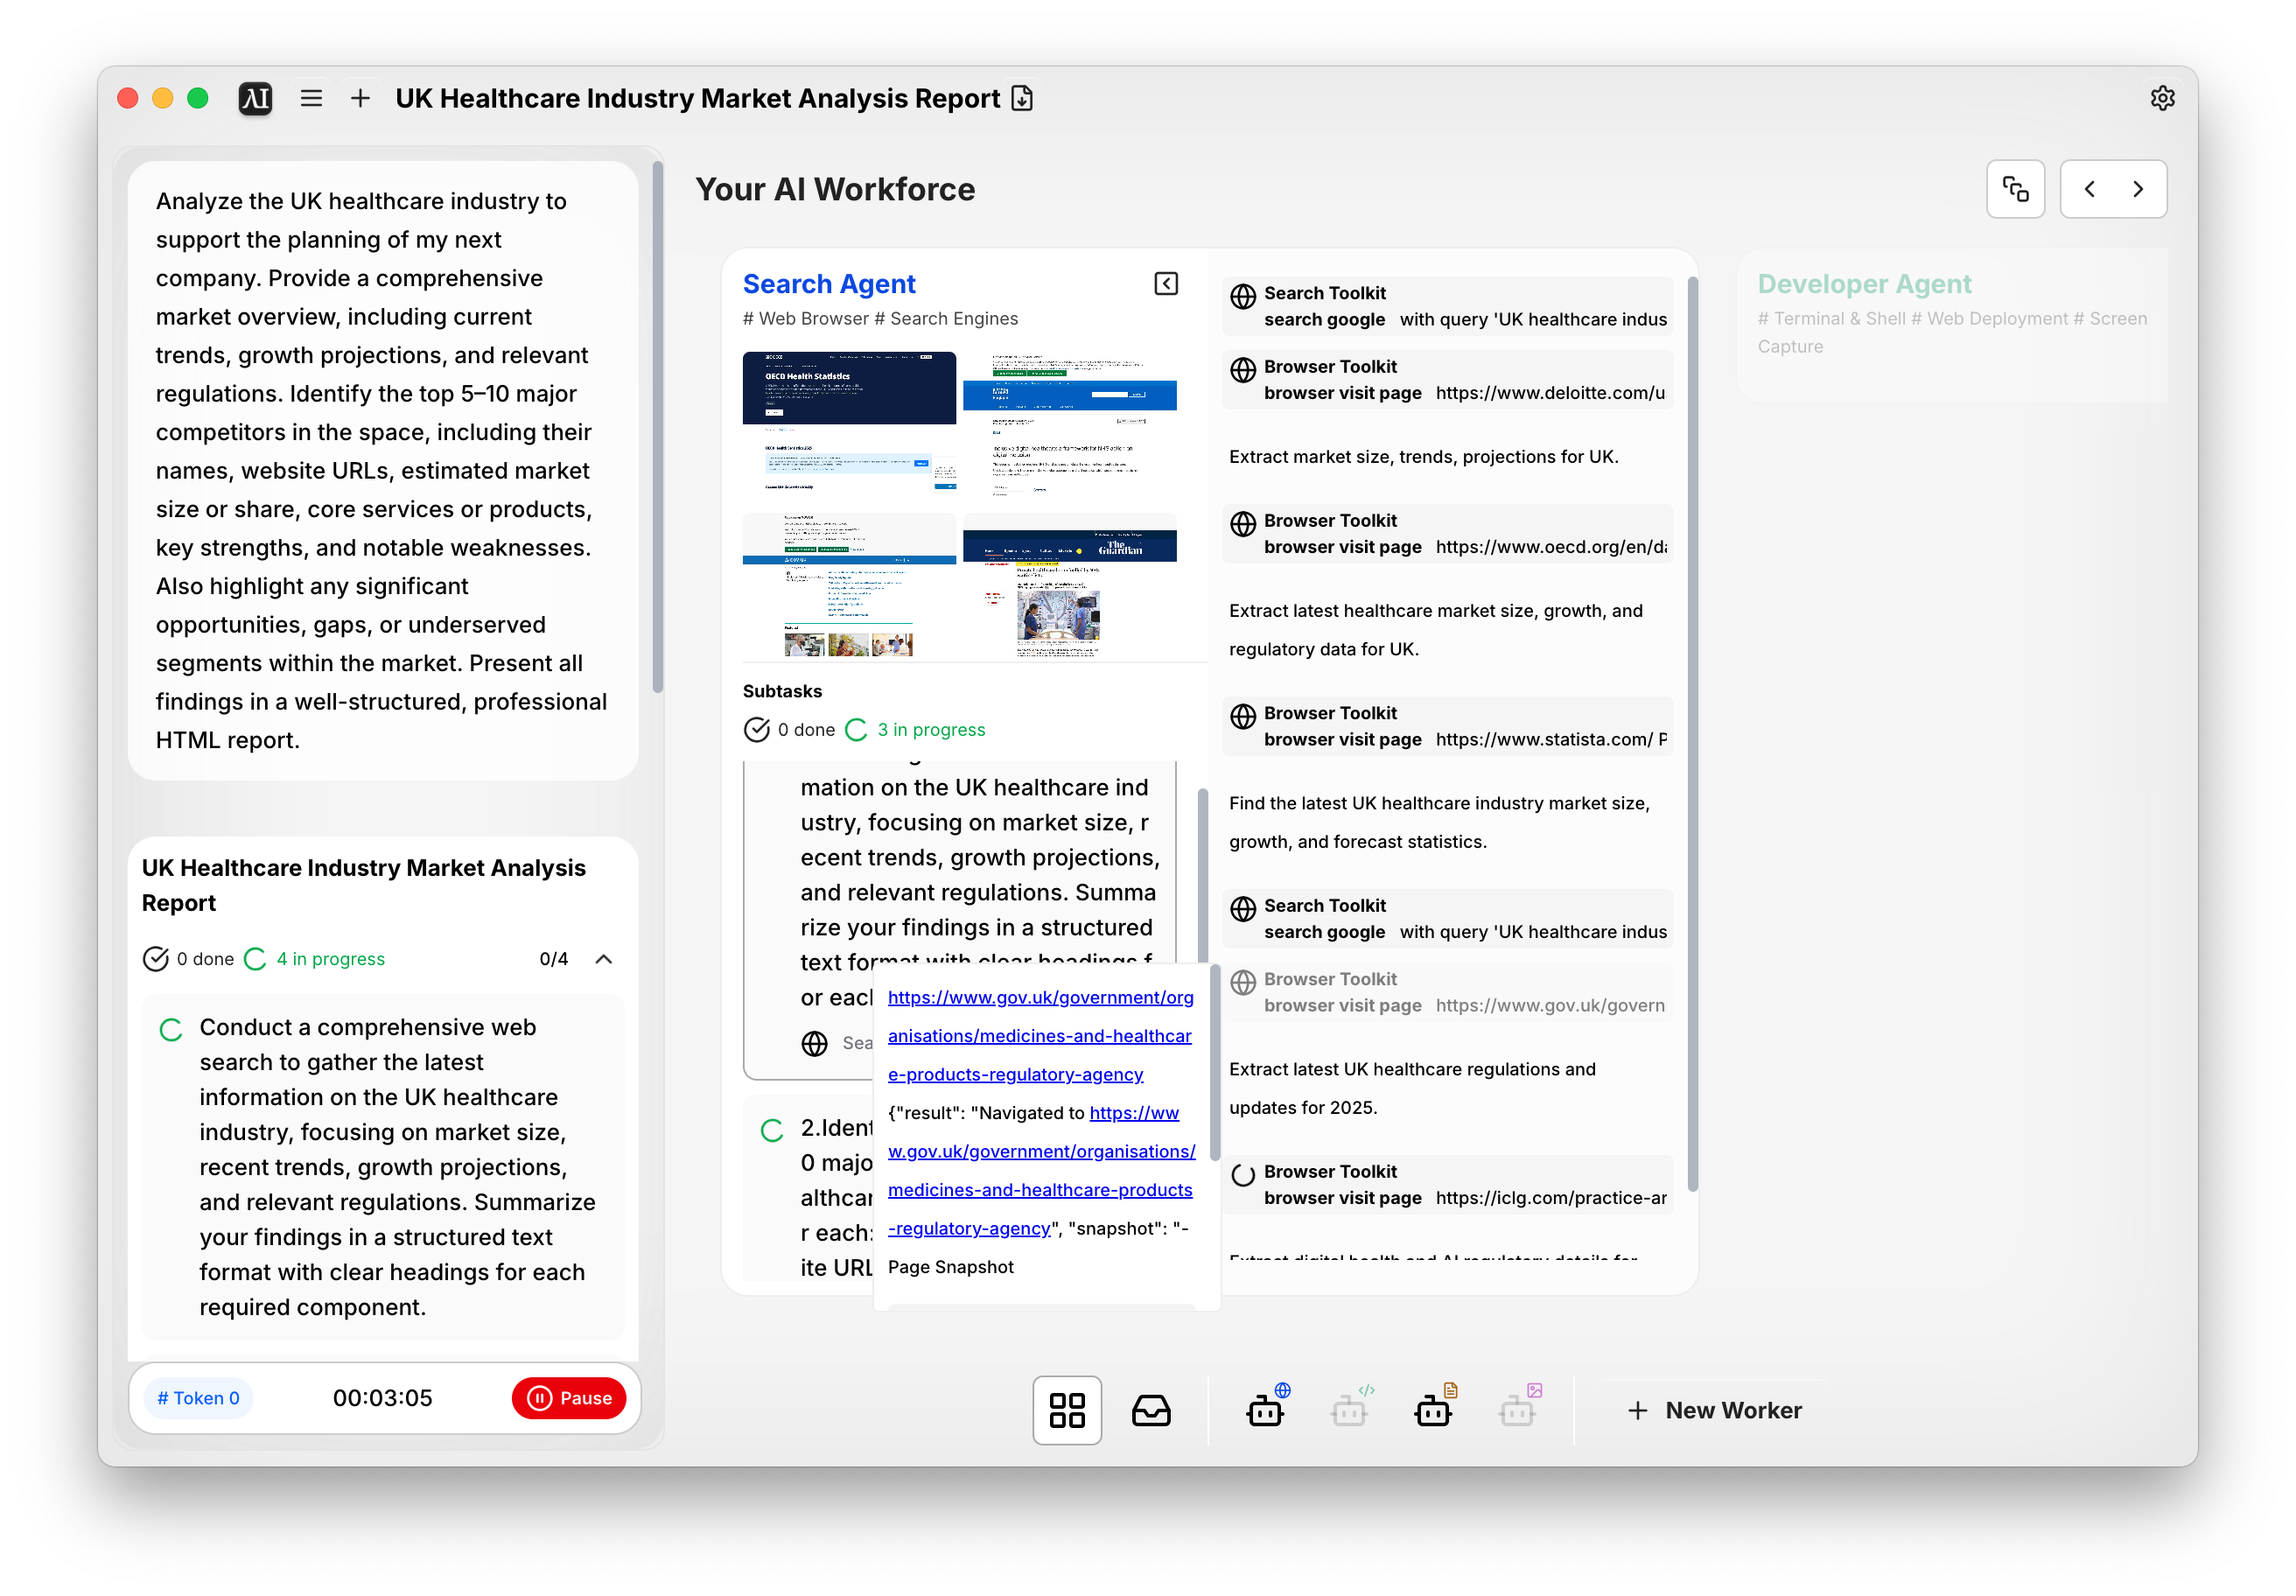
- Canvas Toolbar: At the bottom of the Canvas, you’ll see a toolbar. This is where you manage your views of agents. You can switch between different task views, such as Home, Agent Folder, or a specific worker’s Workspace.
Agent Folder
This is the filing cabinet for your workforce. Any files your agents create or use (like documents, spreadsheets, code, pictures, or presentations) are automatically saved here. These files are also stored locally on your computer and/or in your cloud for easy access.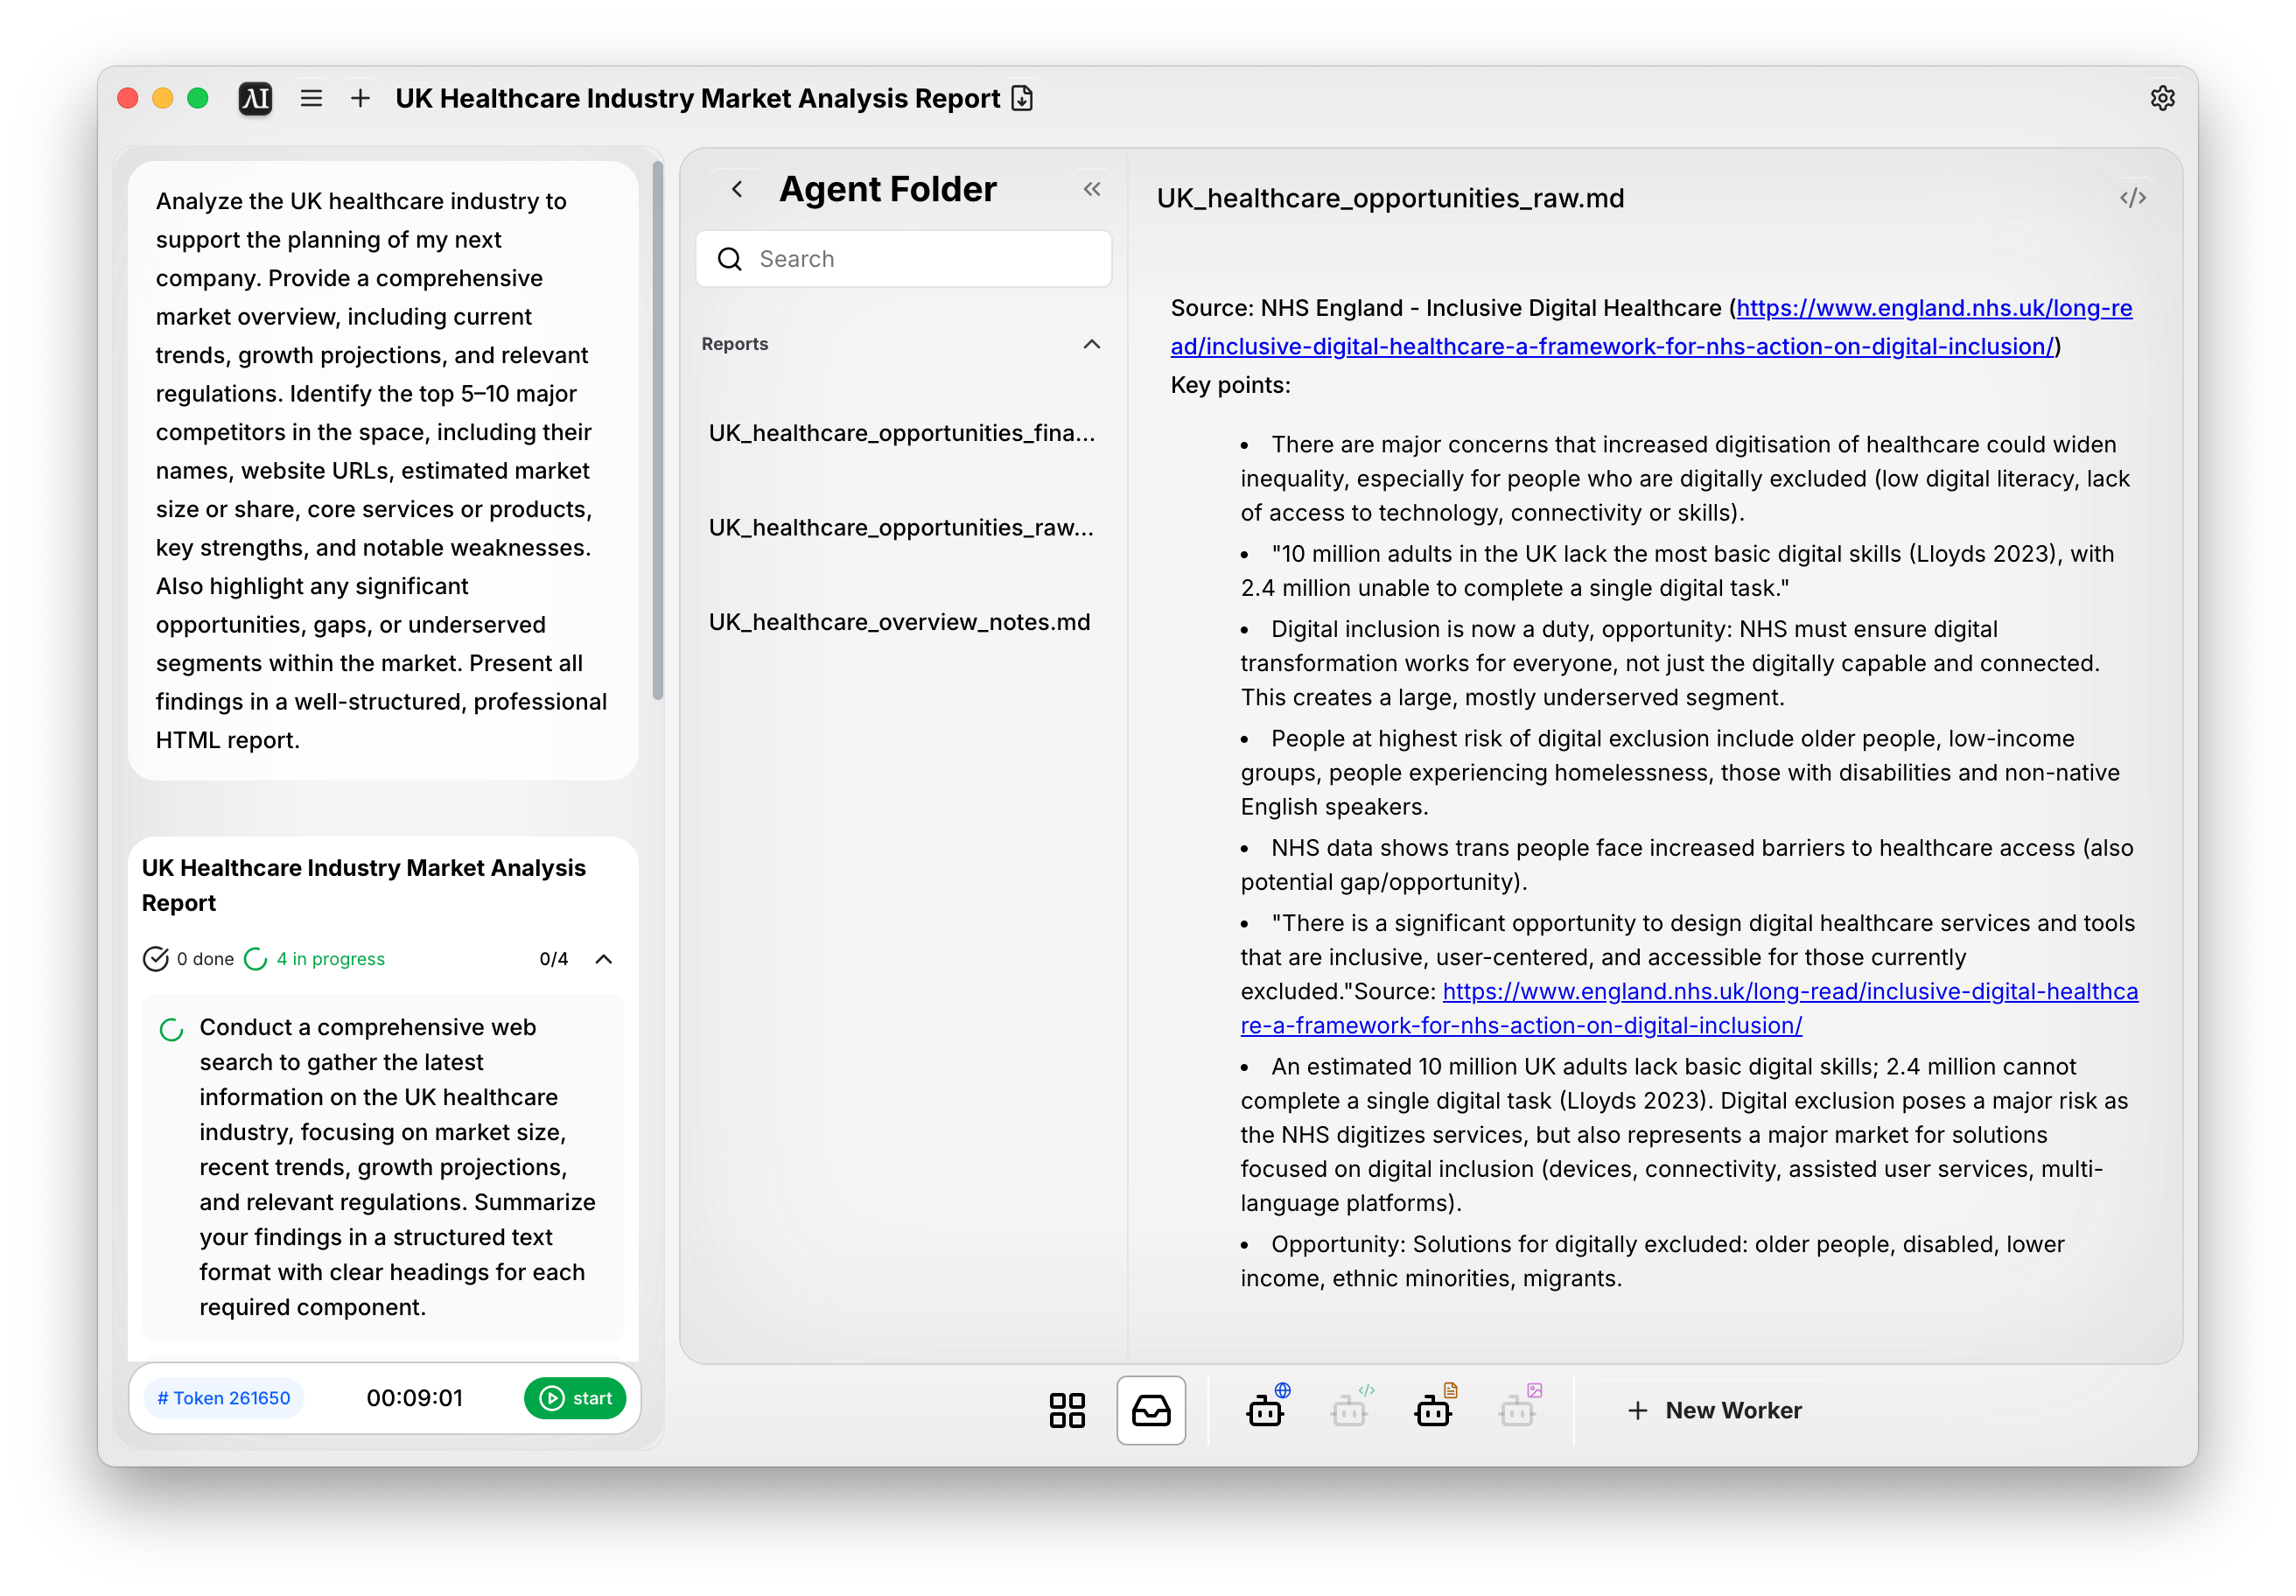
📌 Note on File Storage
You can always find your task files in a dedicated folder on your machine.- Windows:
C:\Users\[YourUsername]\eigent\[YourEmailPrefix]\task_[TaskID] - Mac:
/Users/[YourUsername]/eigent/[YourEmailPrefix]/task_[TaskID]
Pre-built Agents
Eigent comes with four ready-to-work agents. Each is equipped with a specific set of tools and shines at specific tasks—click to explore:- Developer Agent – writes, debugs and executes code
- Browser Agent – fetches and gathers info from the web
- Multimodal Agent – ideals with images, videos and more
- Document Agent – reads, writes and manages files (Markdown, PDF, Word, etc.)
Add your own workers
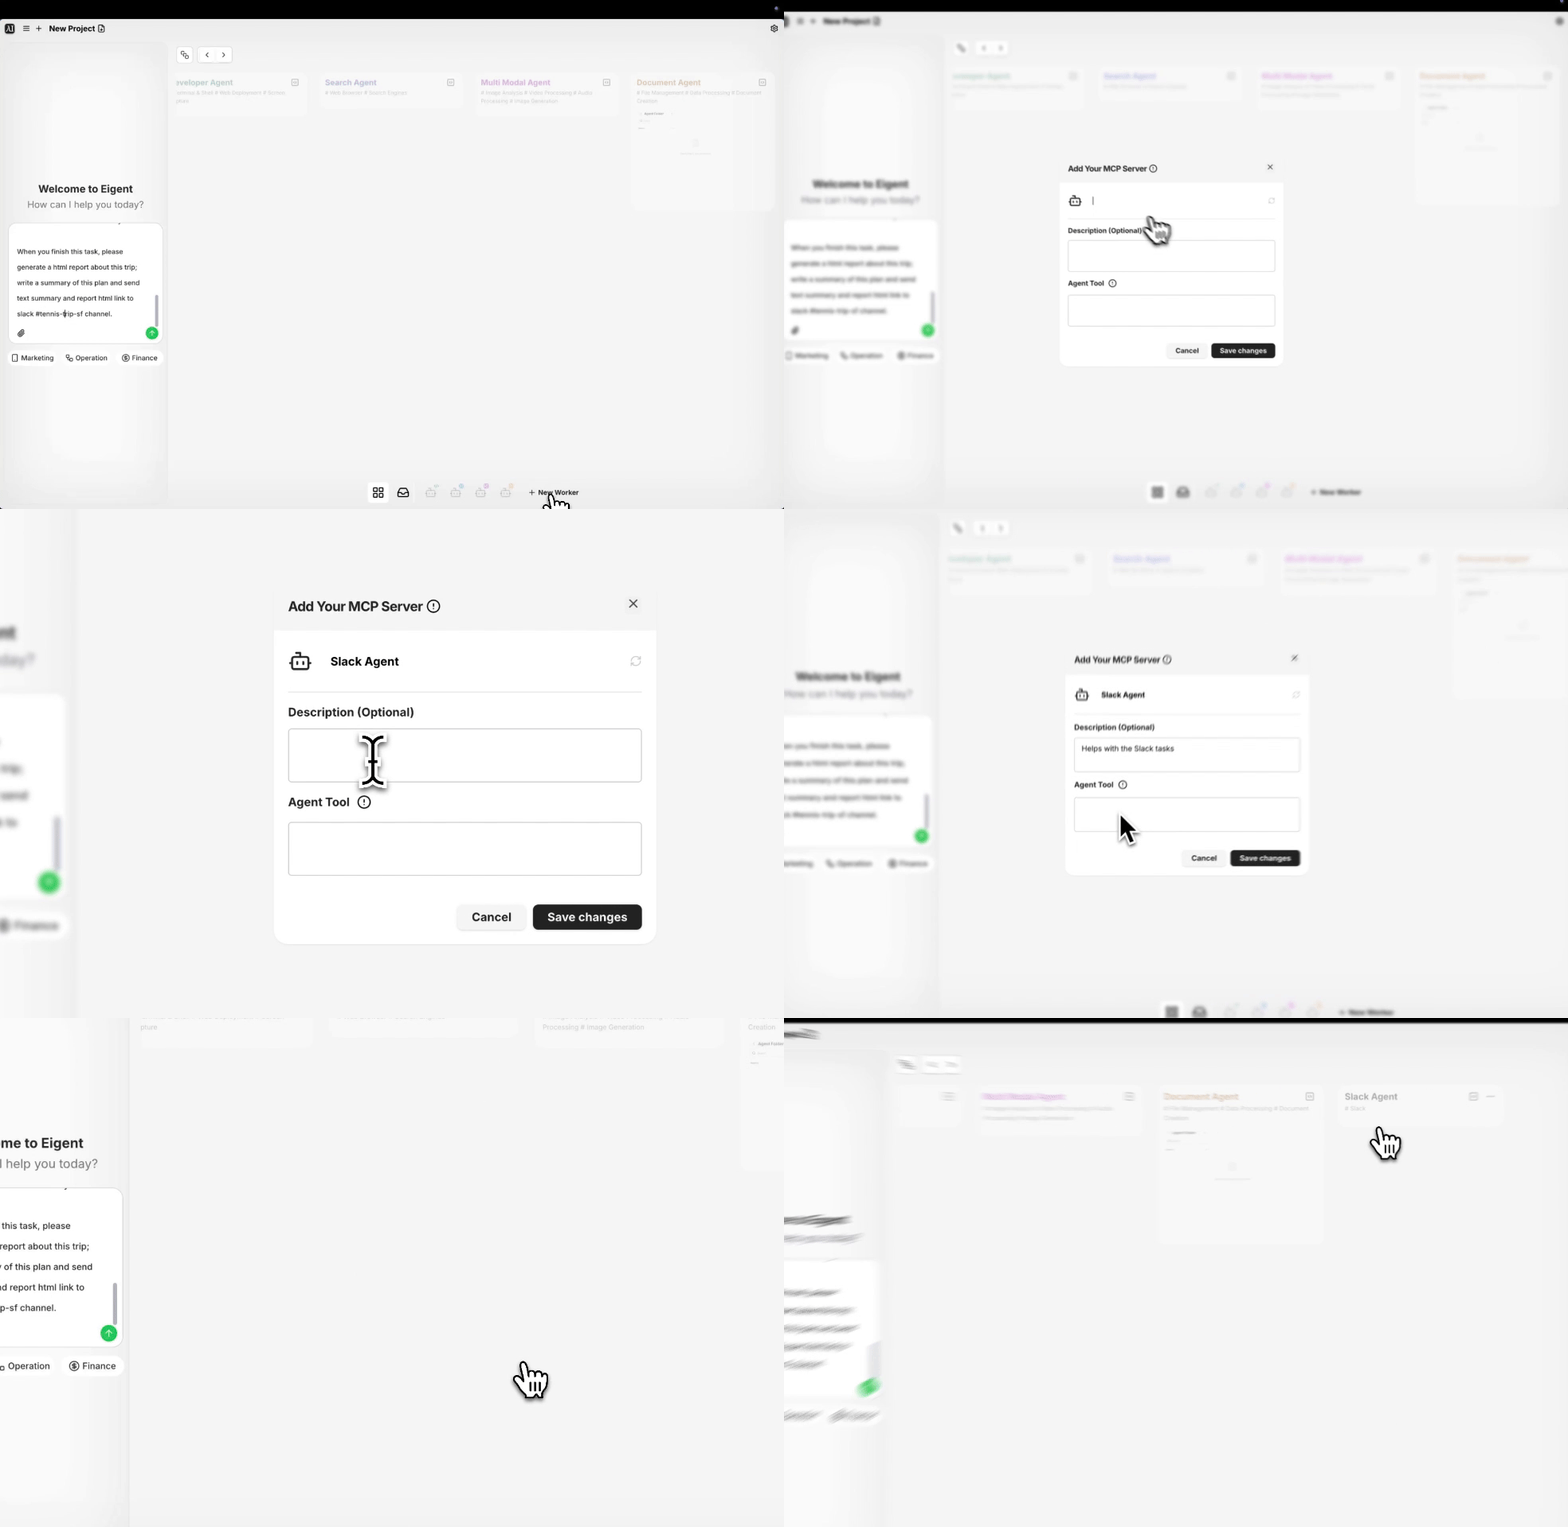
Click “+ Add Workers”, provide:- Name (required)
- Description (optional): the role of your customized agent
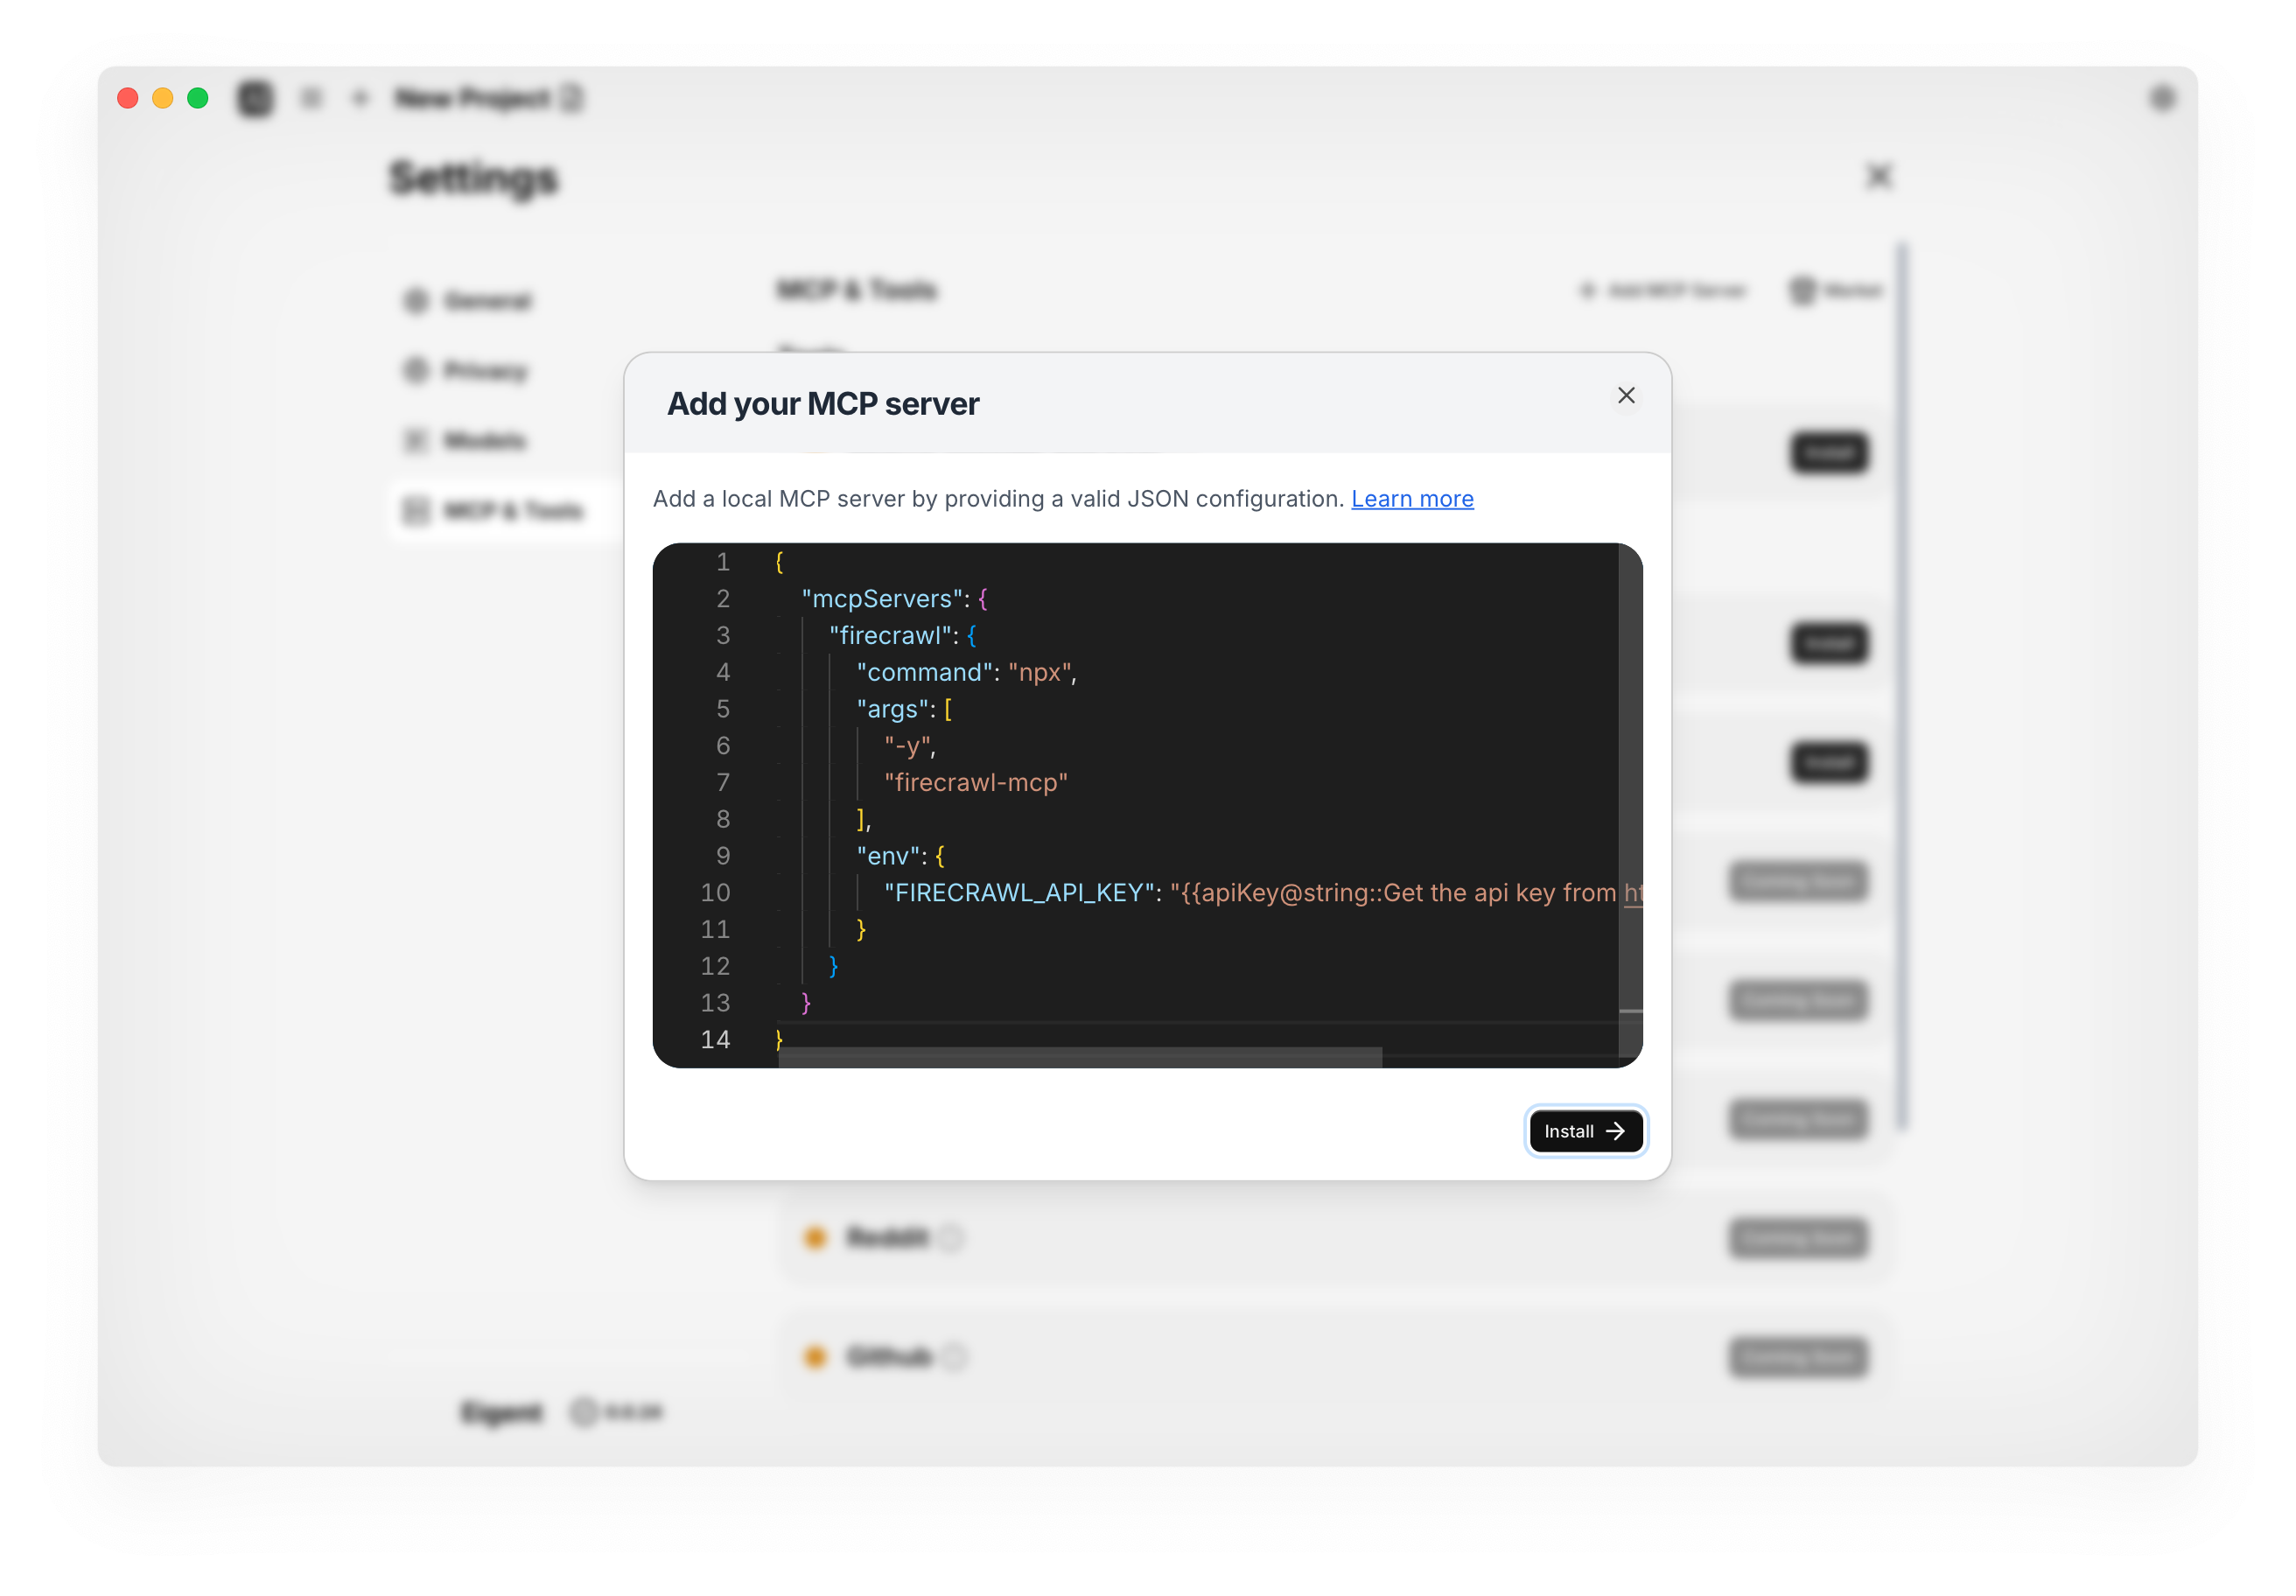
- Agent Tool: install any tool available from our MCP Servers to give your agent the exact skills it needs.
Start Your First Task
Now that you have a workforce, let’s put it to work.Step 1: Define Your Goal
Type your task in the top Message Box. Be as descriptive as you like. For example, ask Eigent to conduct an UK healthcare market research . You can attach files (like docs, data, images) by clicking the paperclip icon in the Message Box.Then, hit Send.Step 2: Review Subtask Flow
Once you send your task, our Coordinator Agent and Task Agent kick in to break it into subtasks. You’ll see:- Workforce CoT Box: shows agent’s “Chain-of-Thought.” This tells you how the AI interpreted your request and its reasoning path.
- Task Status Box: displays subtasks with controls. You can add, edit, or delete any subtask to make sure the plan is perfect. If you’re not happy with the plan, just click “Back to edit” to refine your initial request.
Step 3: Lauch the Task
Once you’re happy with the plan, hit Start Task. Eigent will automatically assign each subtask to the best agent for the job based on the tools they have.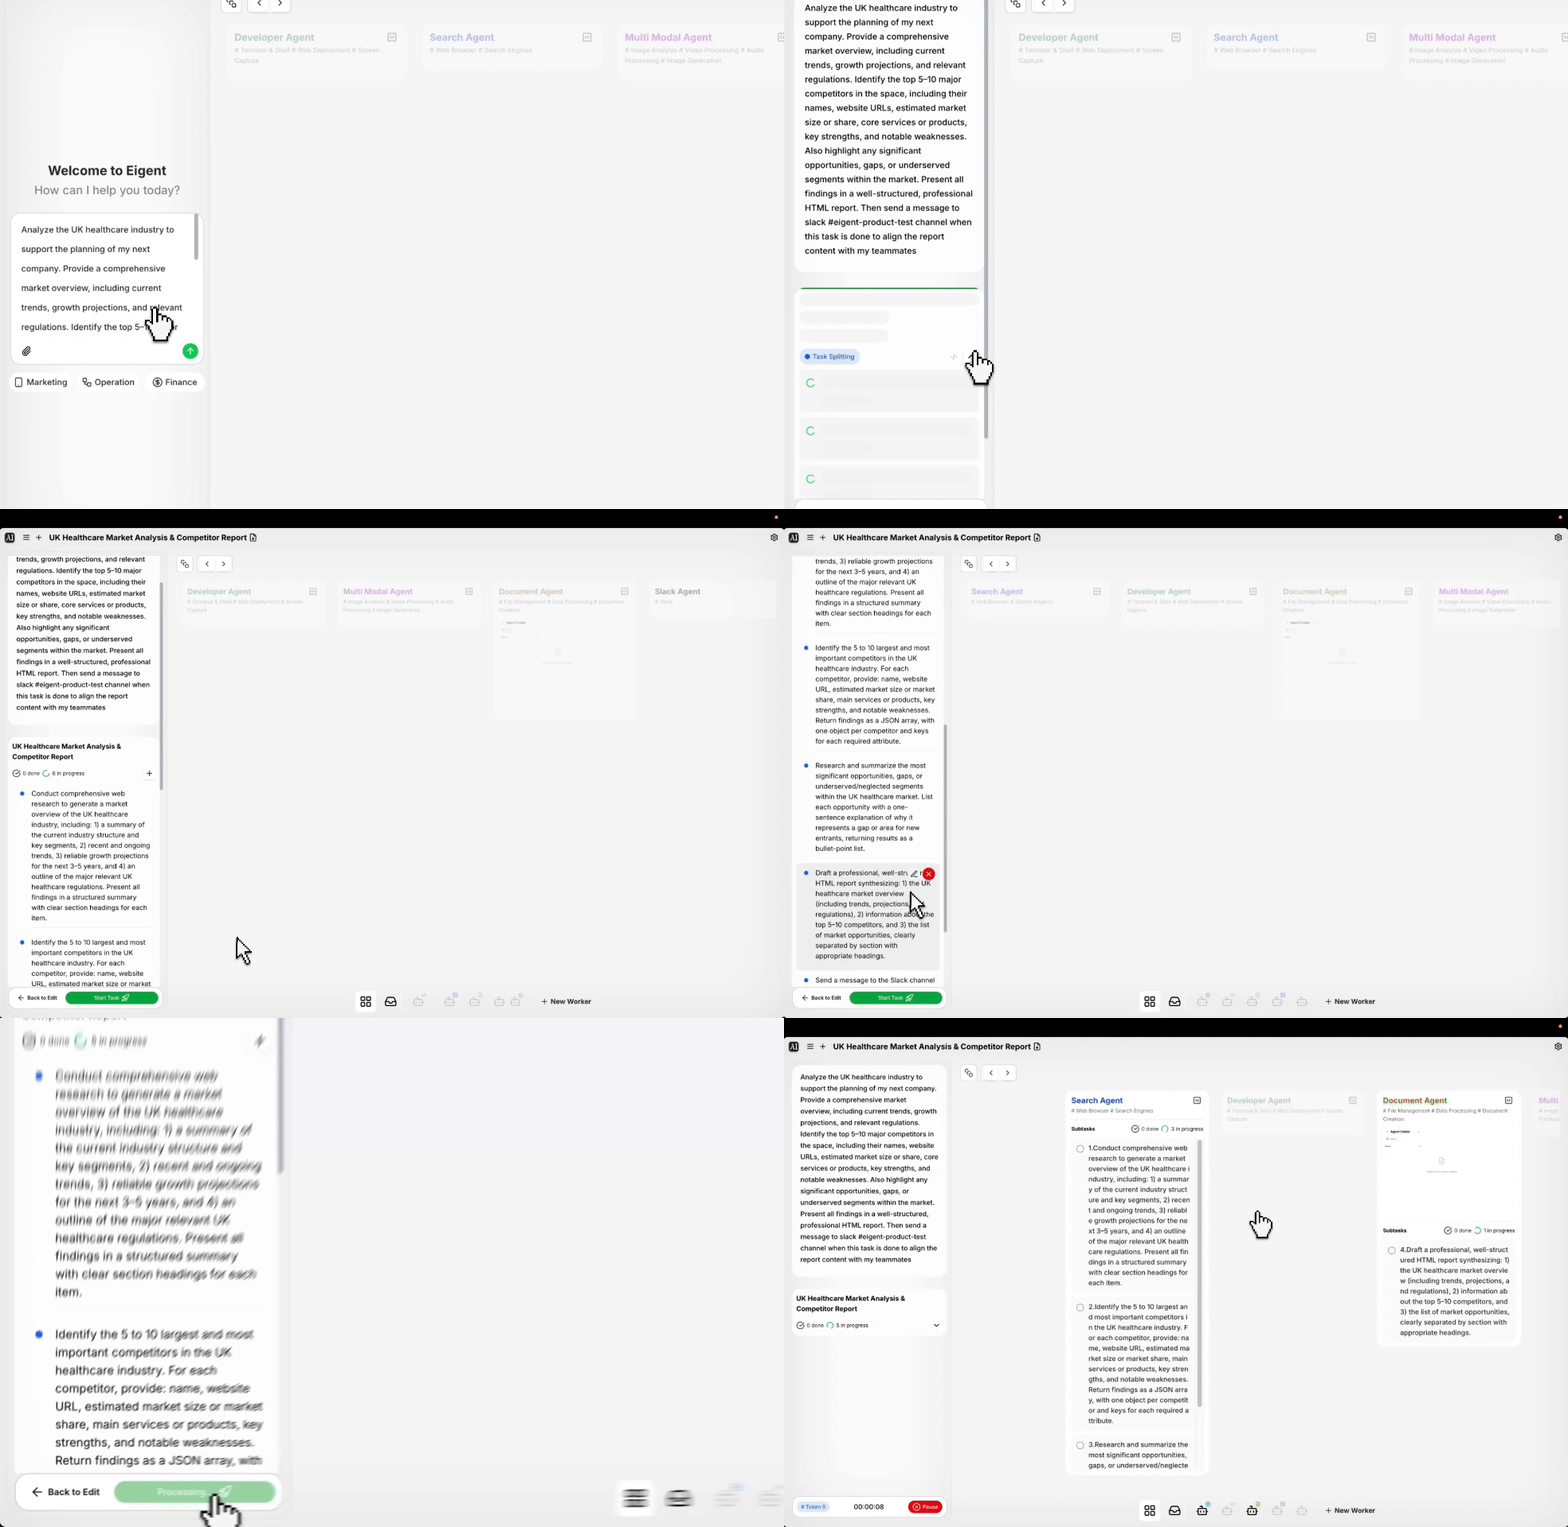
Watch Agents Work
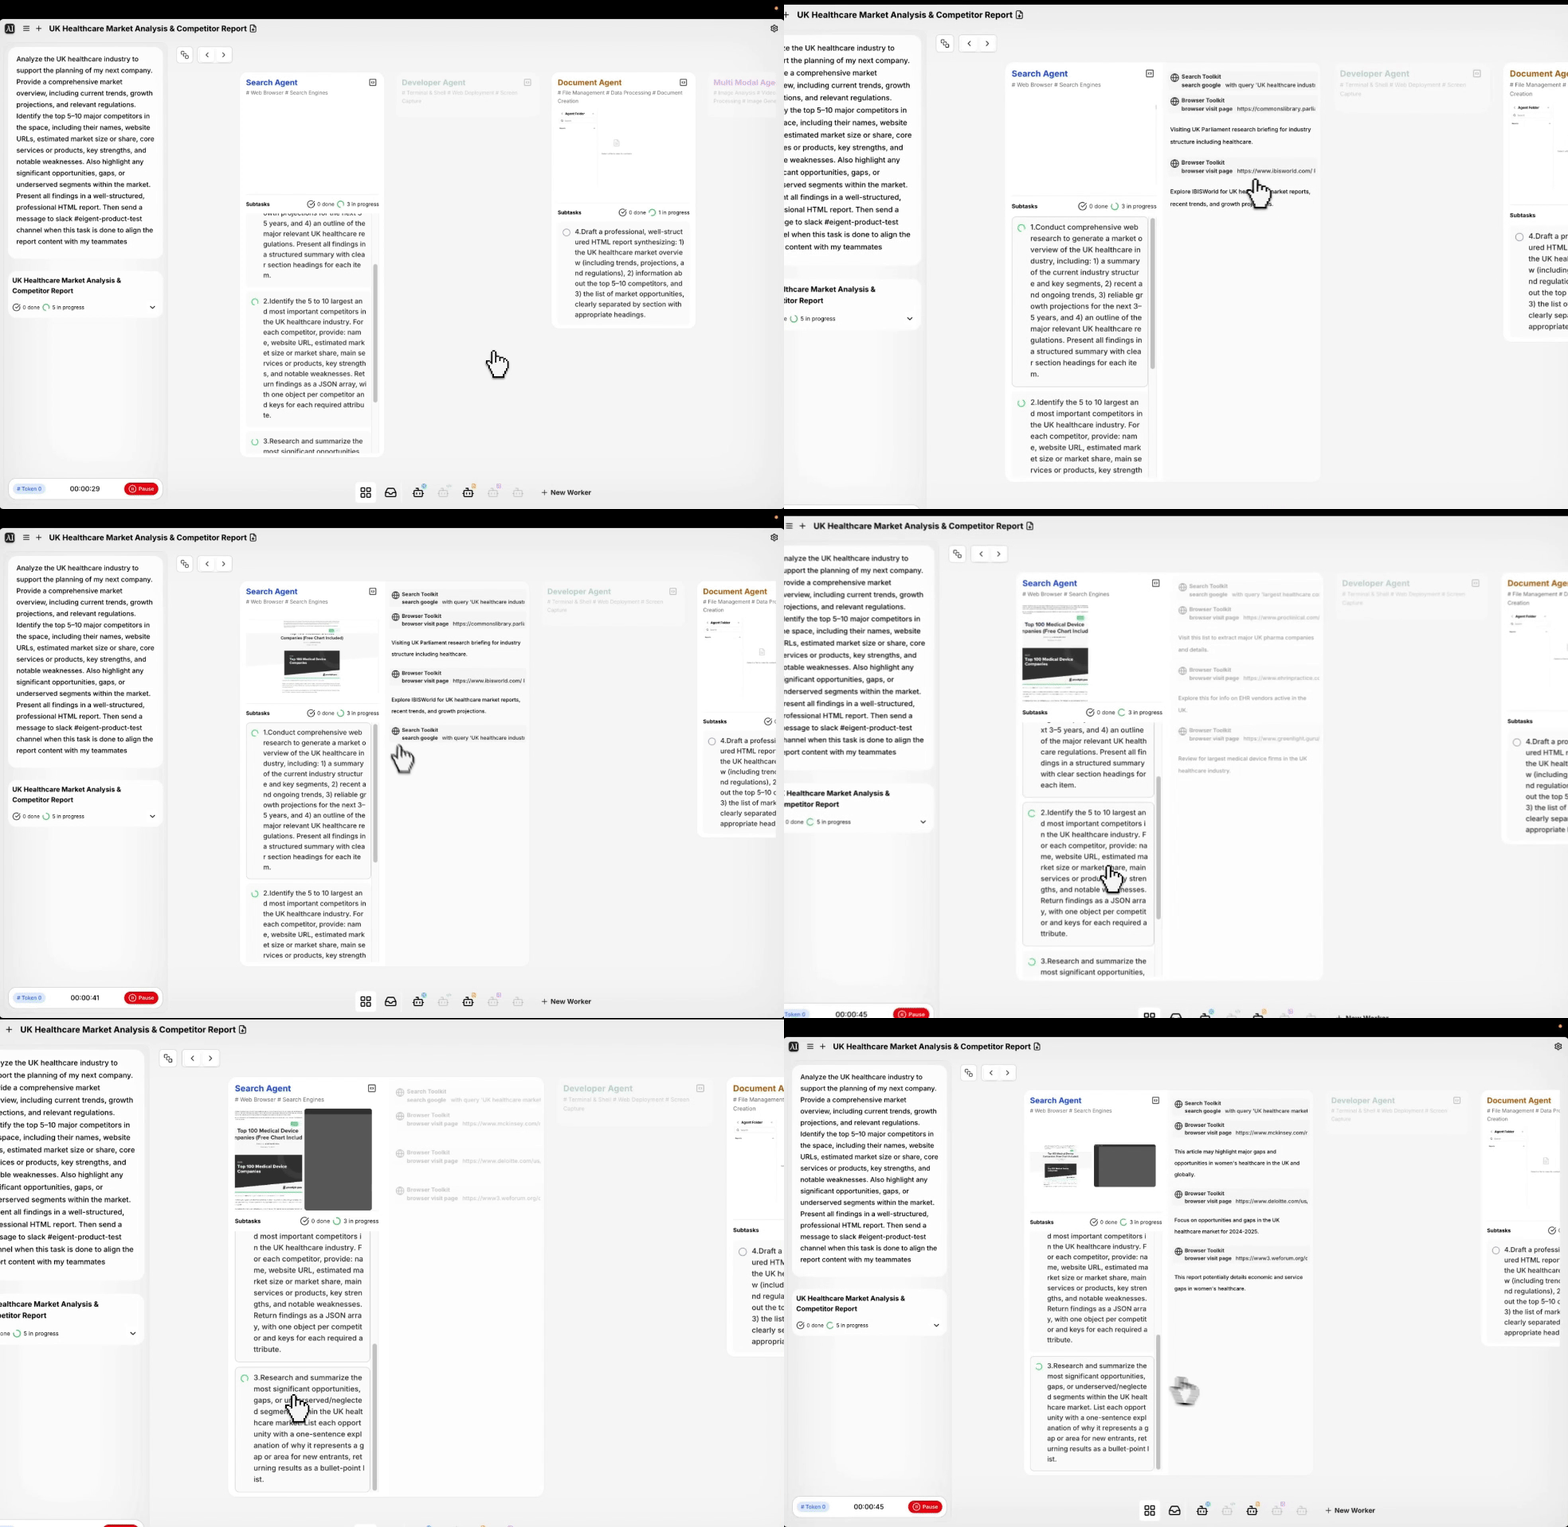
Once the task starts, your agents will run in parallel on the Canvas:- Click a subtask to view logs:
- Reasoning Steps: The agent’s logic for how it’s approaching the subtask.
- Tool Calls: Which specific tool the agent is using (e.g.,
search_google,load_files). - Task Results: The output or conclusion of the subtask.
- Hover over tasks to see status details
 Click on an agent icon to open its Workspace:
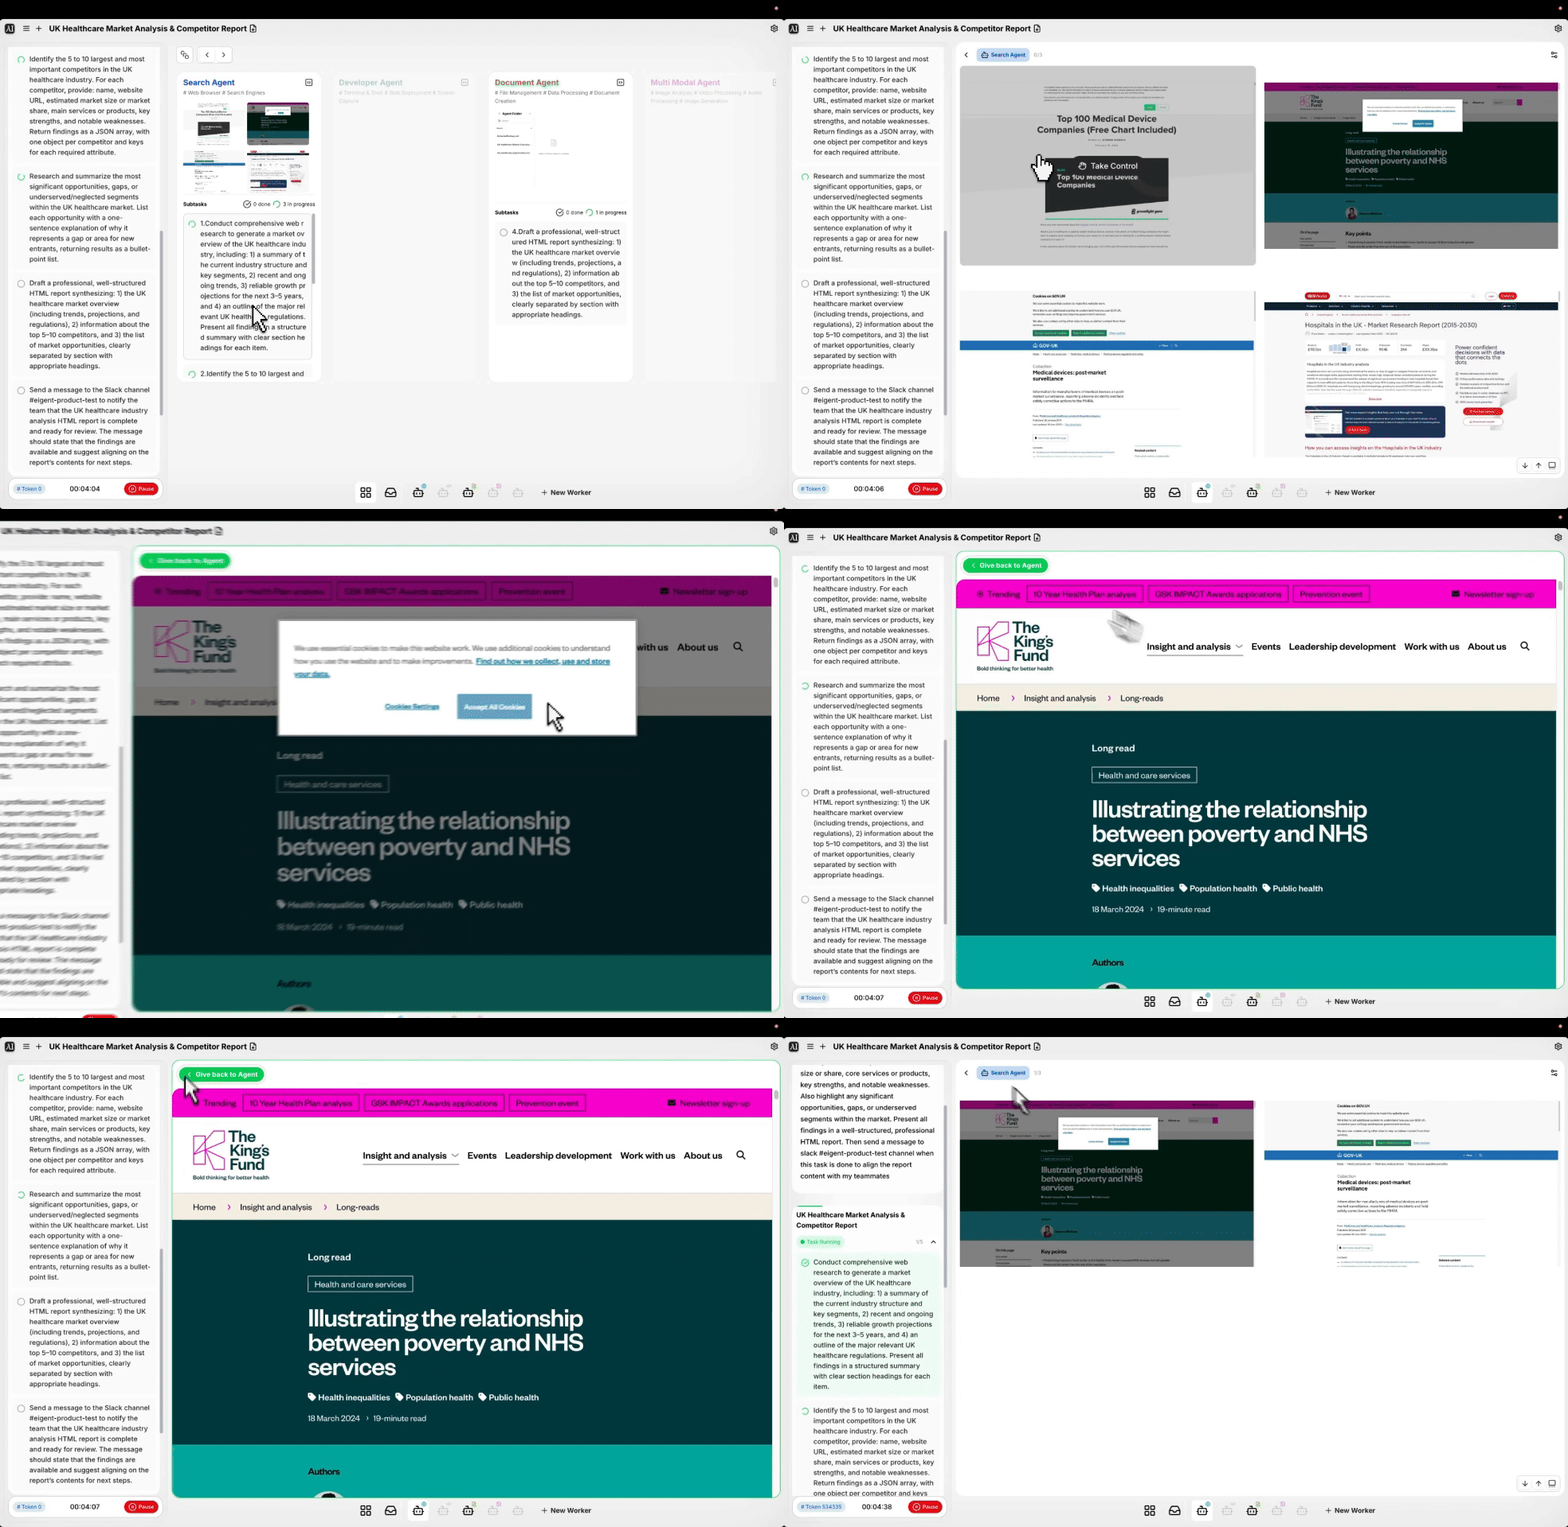
- Example 1: open Browser Agent, launch embedded browser
- Use “Take Control” to take over browsing (e.g., accept cookies), then return control to the agent
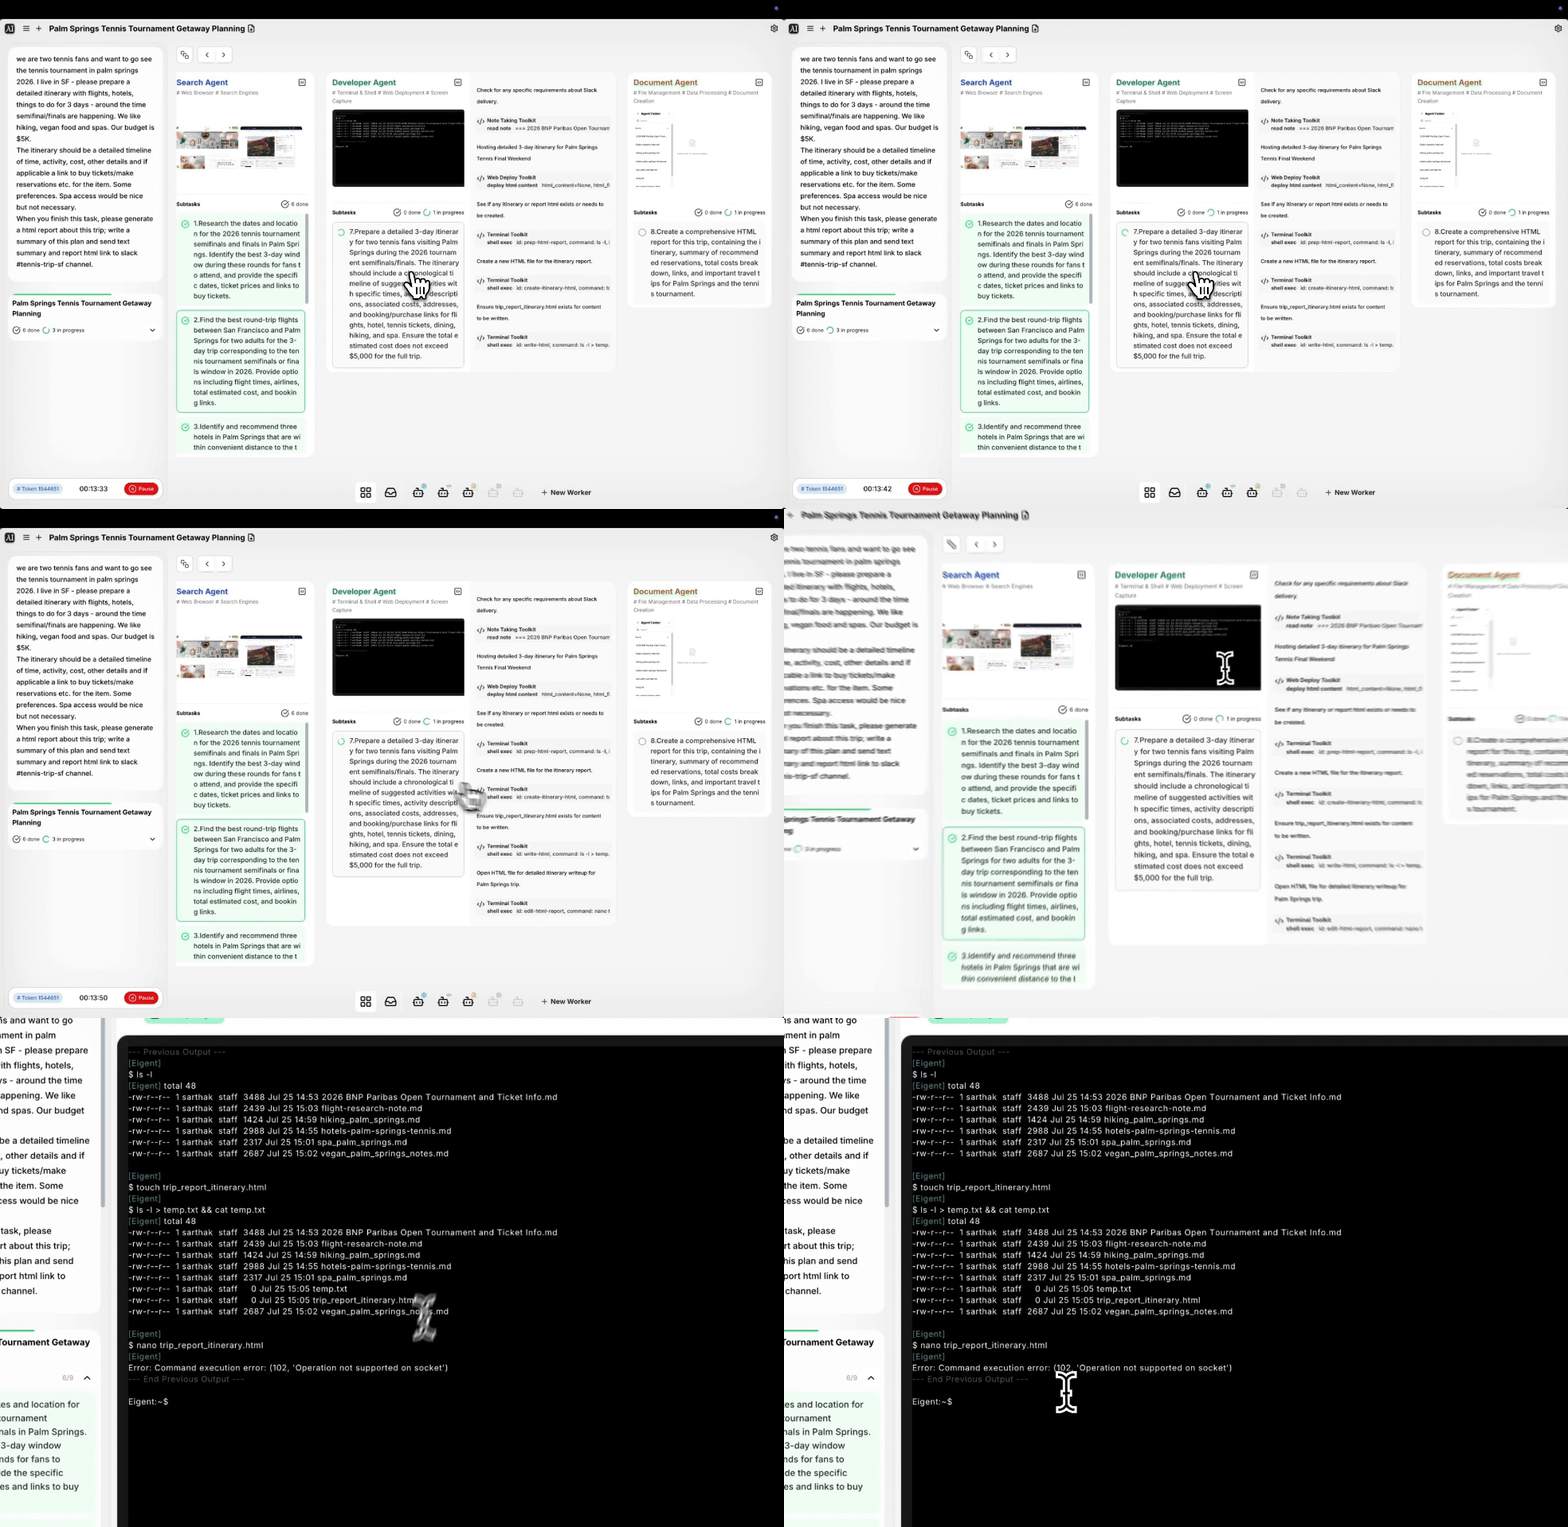
- Example 2: open Developer Agent, lauch Terminal
Human in the Loop
Sometimes, an agent may needs your input to proceed with the subtask (e.g., confirmation or extra data). In this case, a request will pop up in the Message Box. Simply type your response and send it.A Quick Tour of Settings
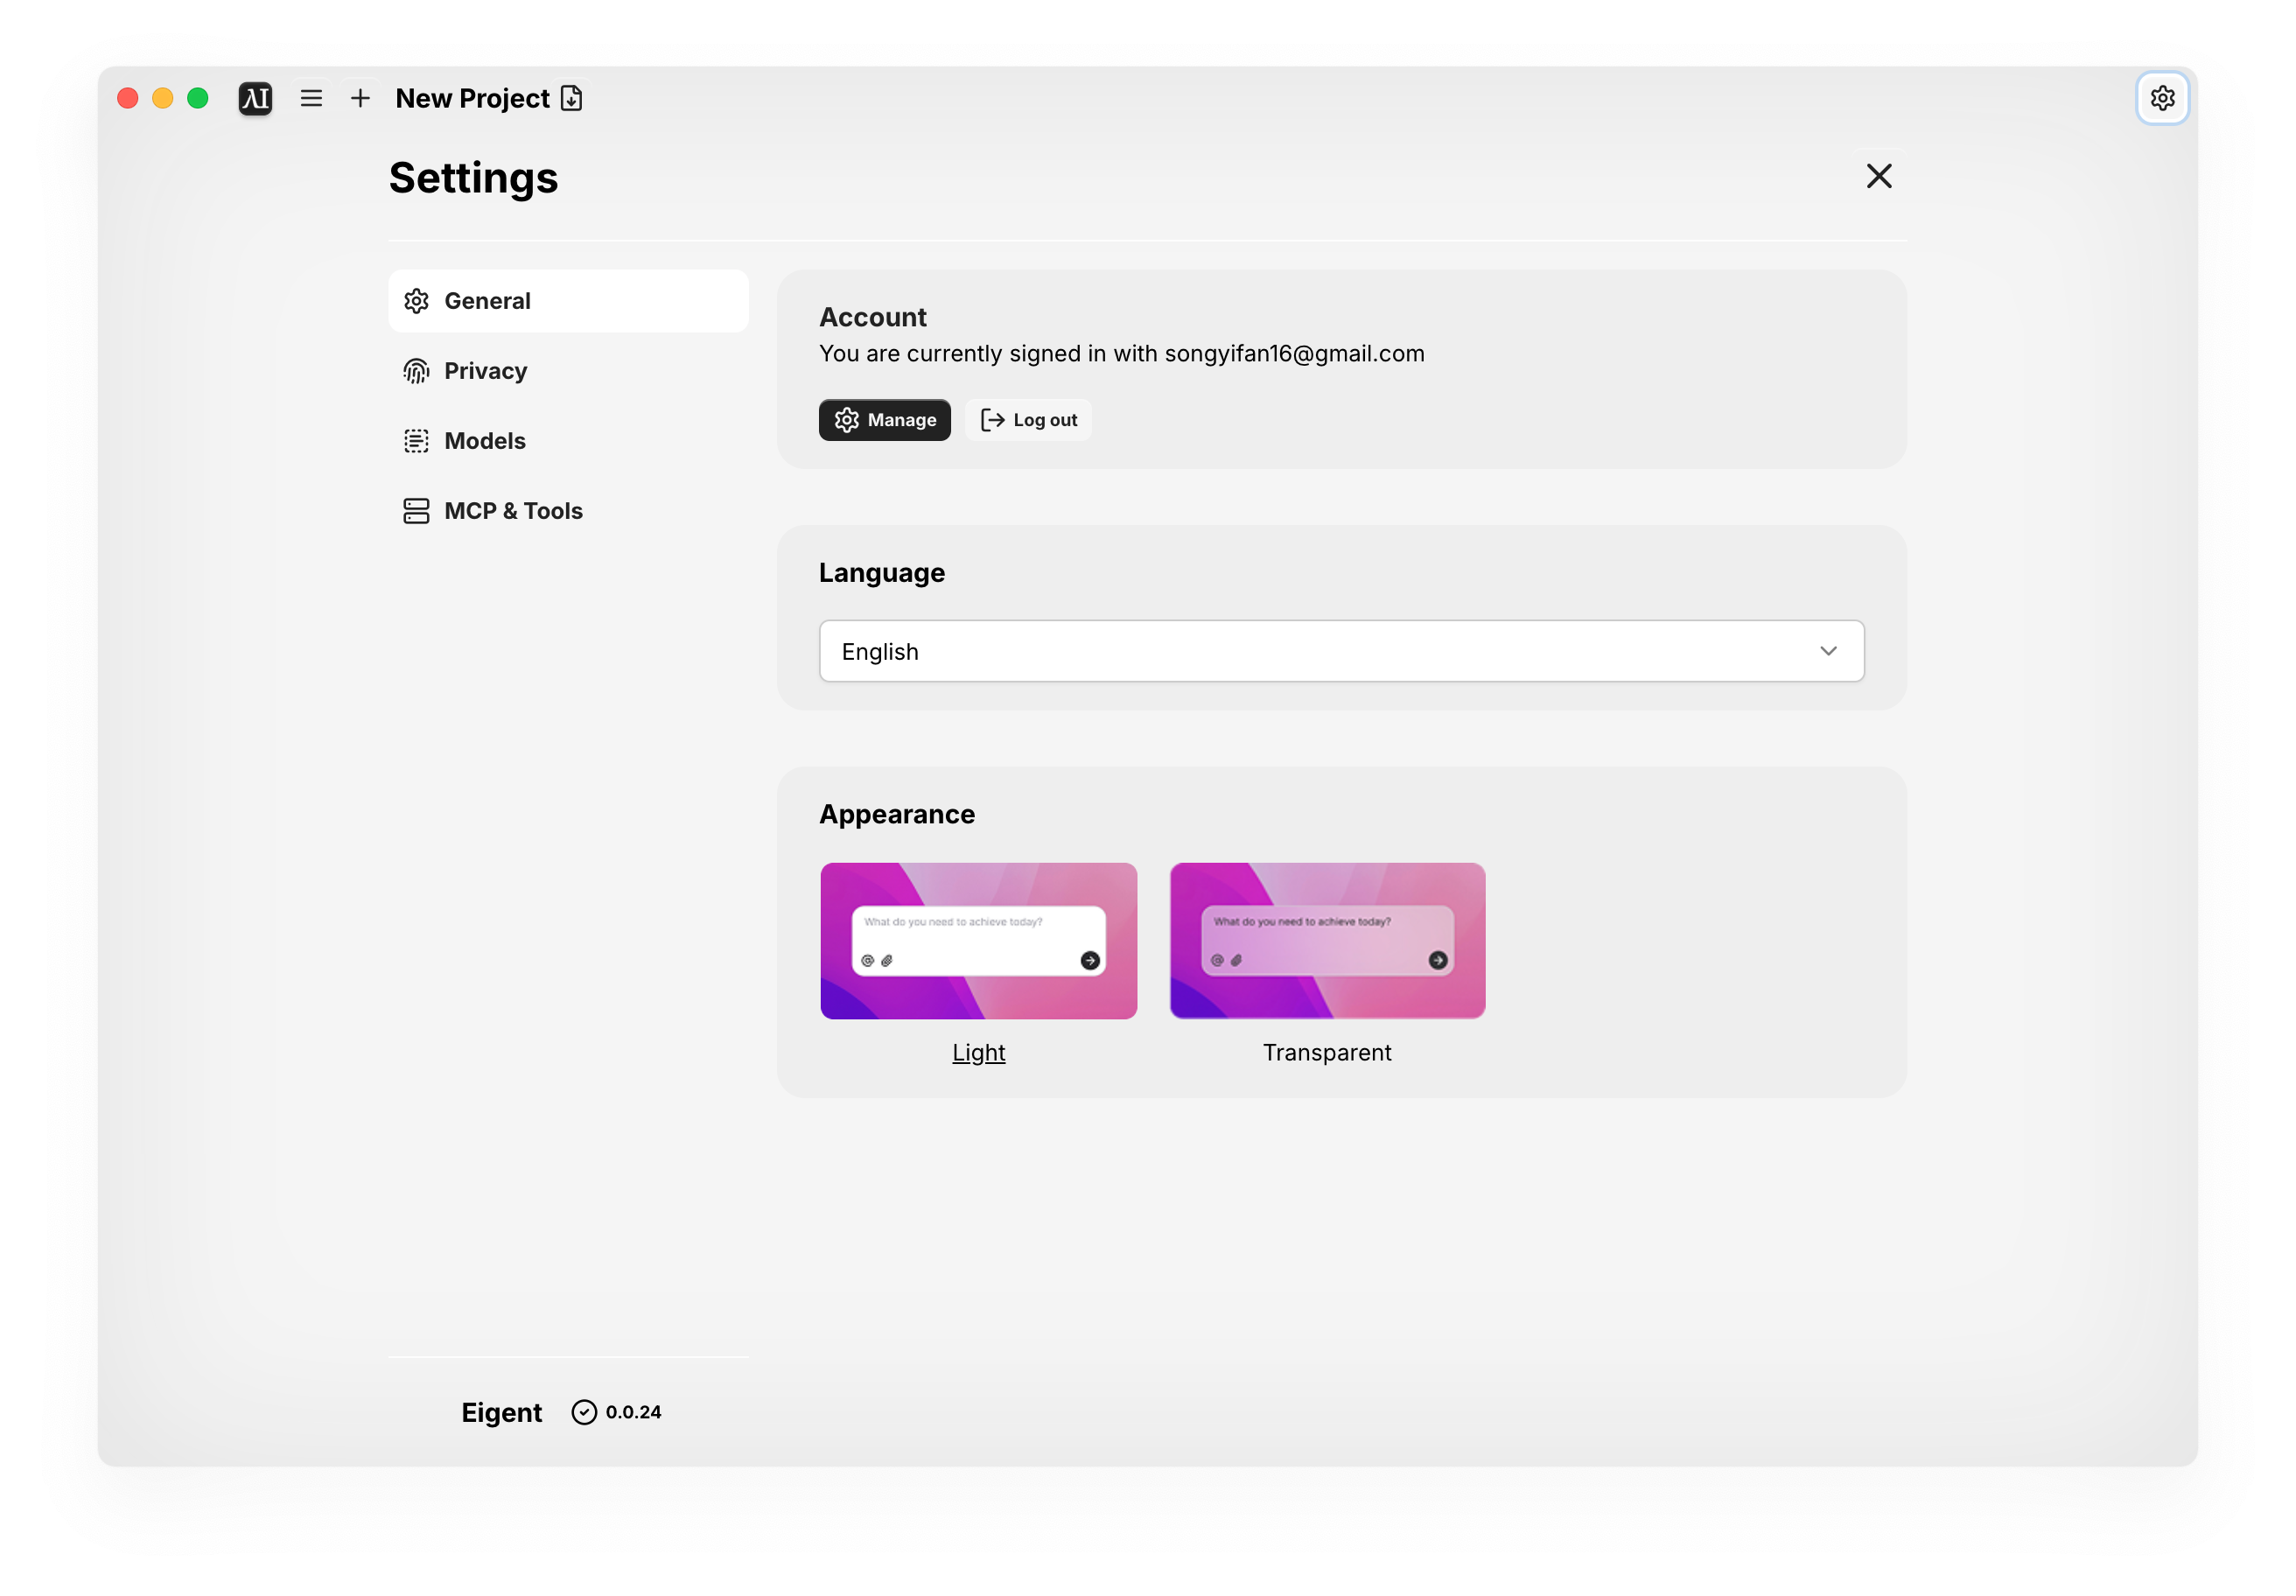
Click the gear icon in the top-right corner to open Settings. Here’s a brief overview.General
- Account: Manage your subscription or log out.
- Language: Choose between English, Simplified Chinese, or your System Default.
- Appearance: Switch between Light mode. On macOS, a Transparent mode is also available.
Privacy
Your privacy is important to us! Because Eigent agents operate on your desktop, they may need permissions to take screenshots or access local files to complete tasks. You can enable and manage all these permissions here.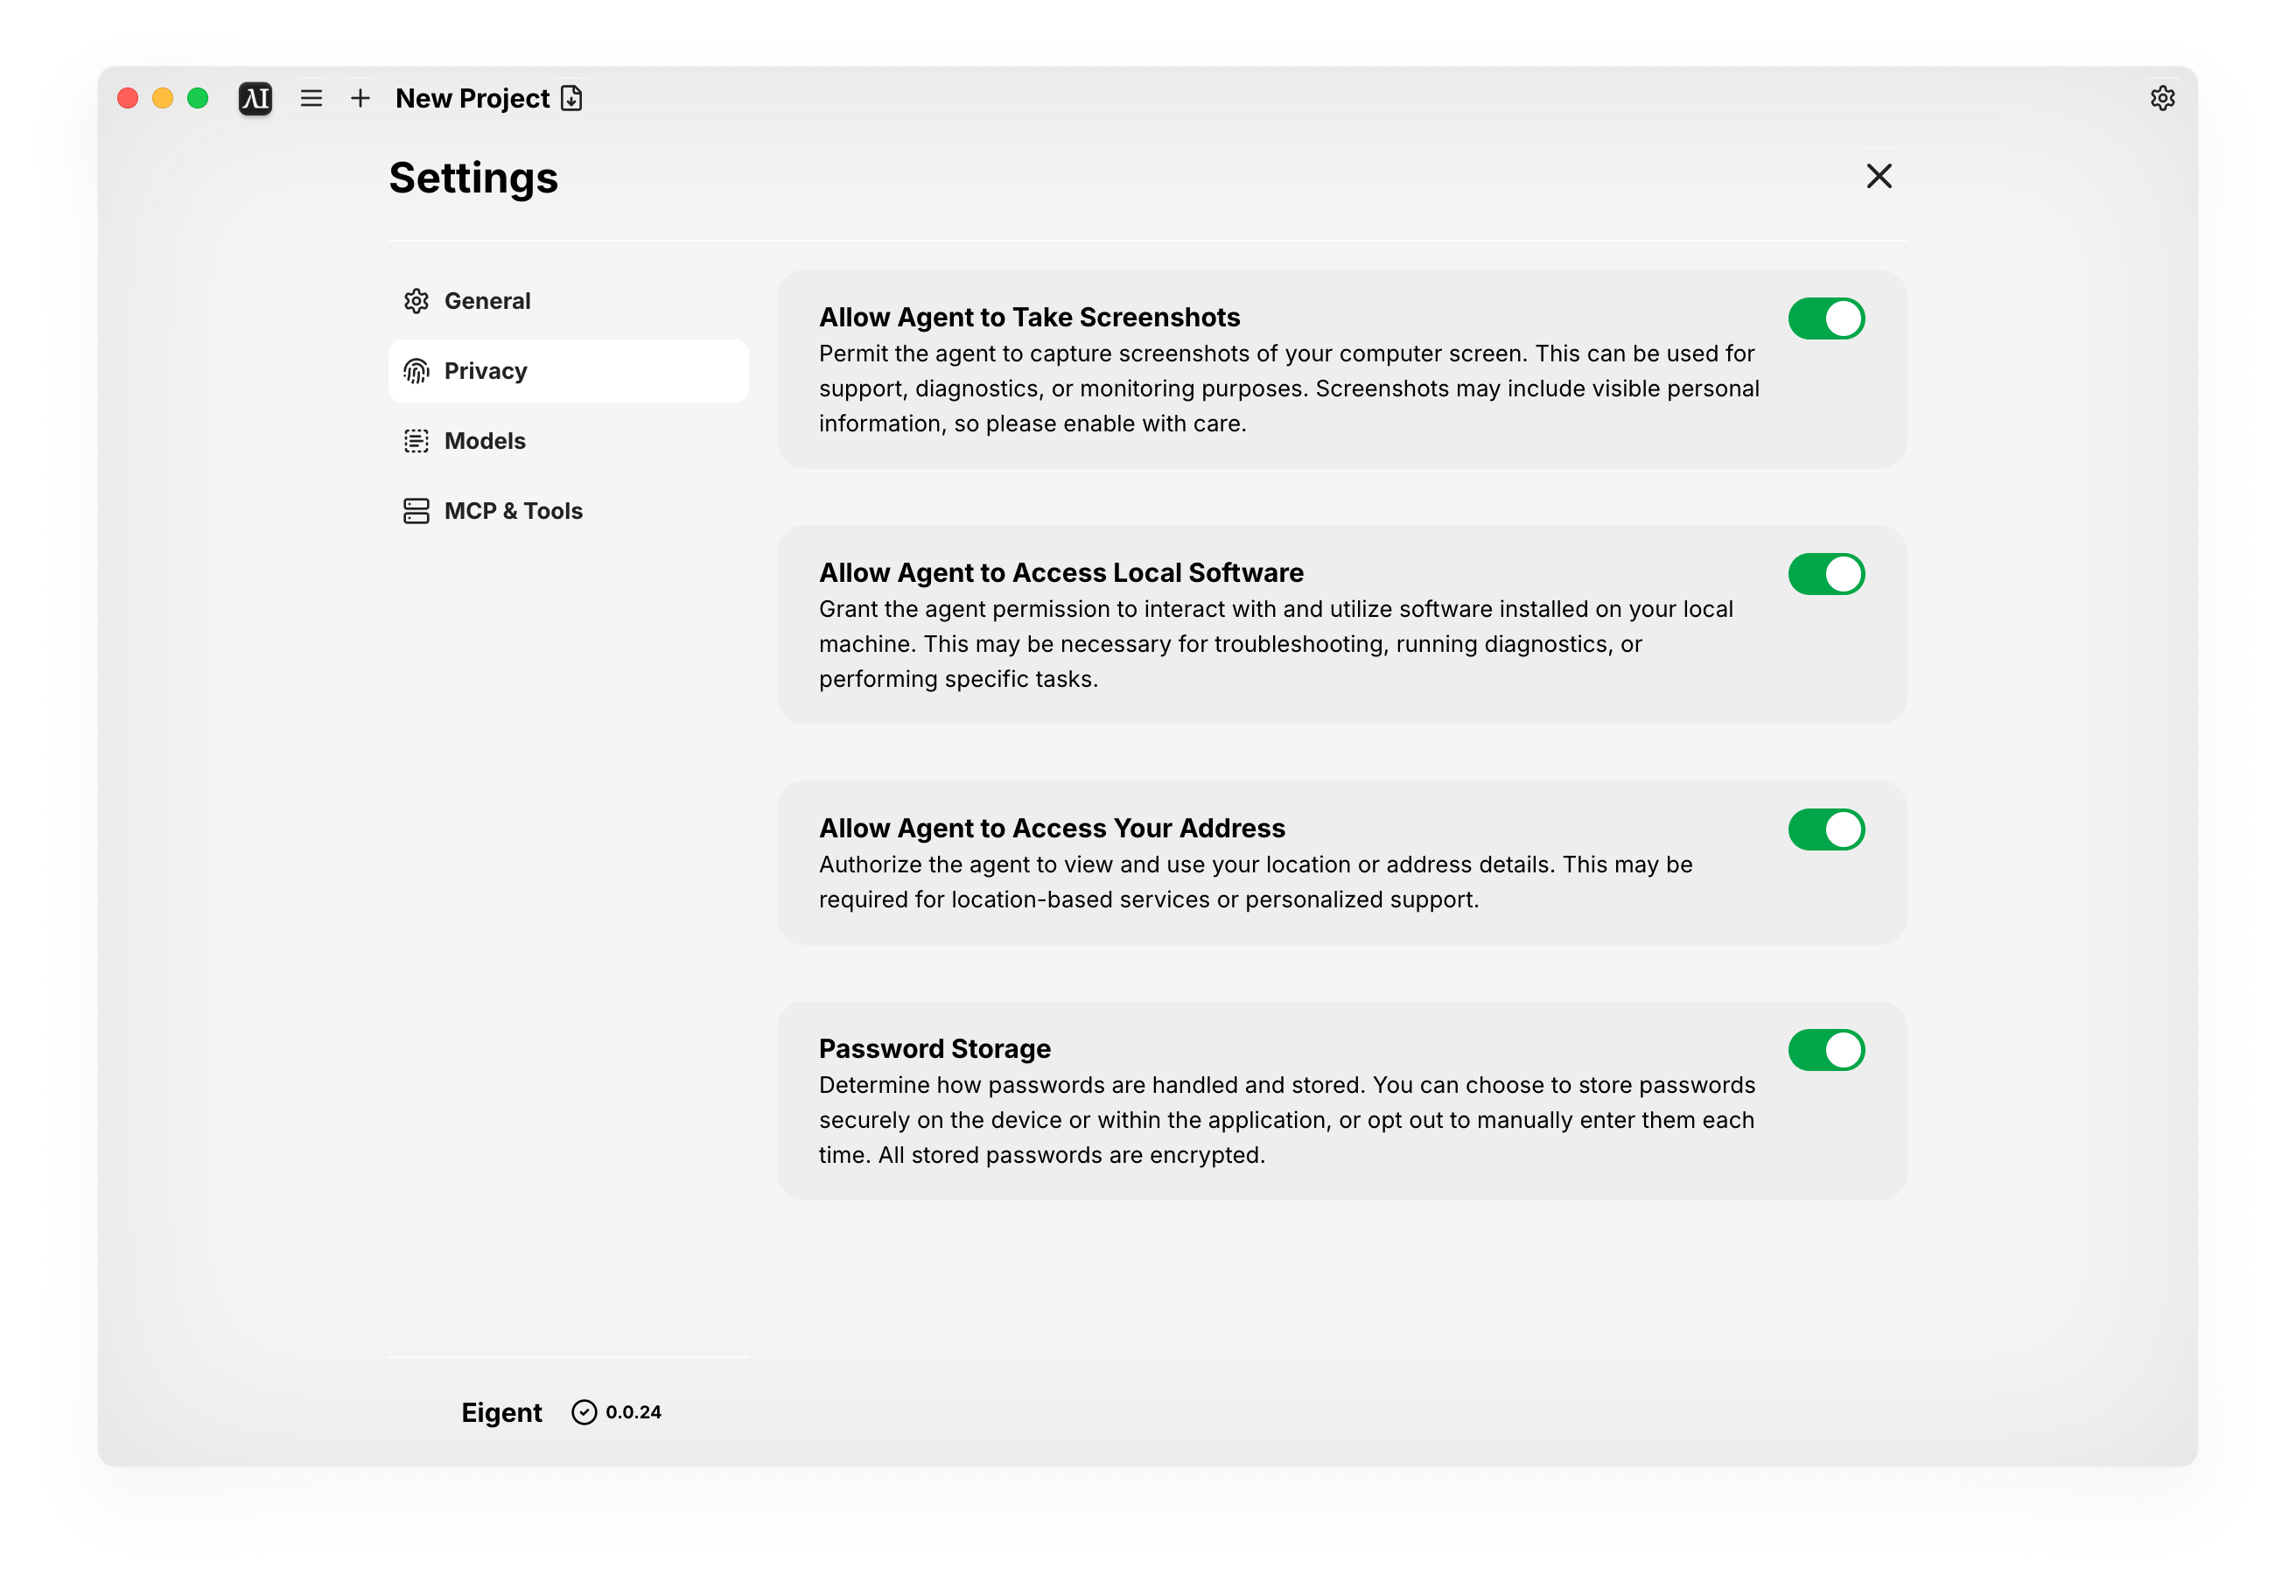
Models
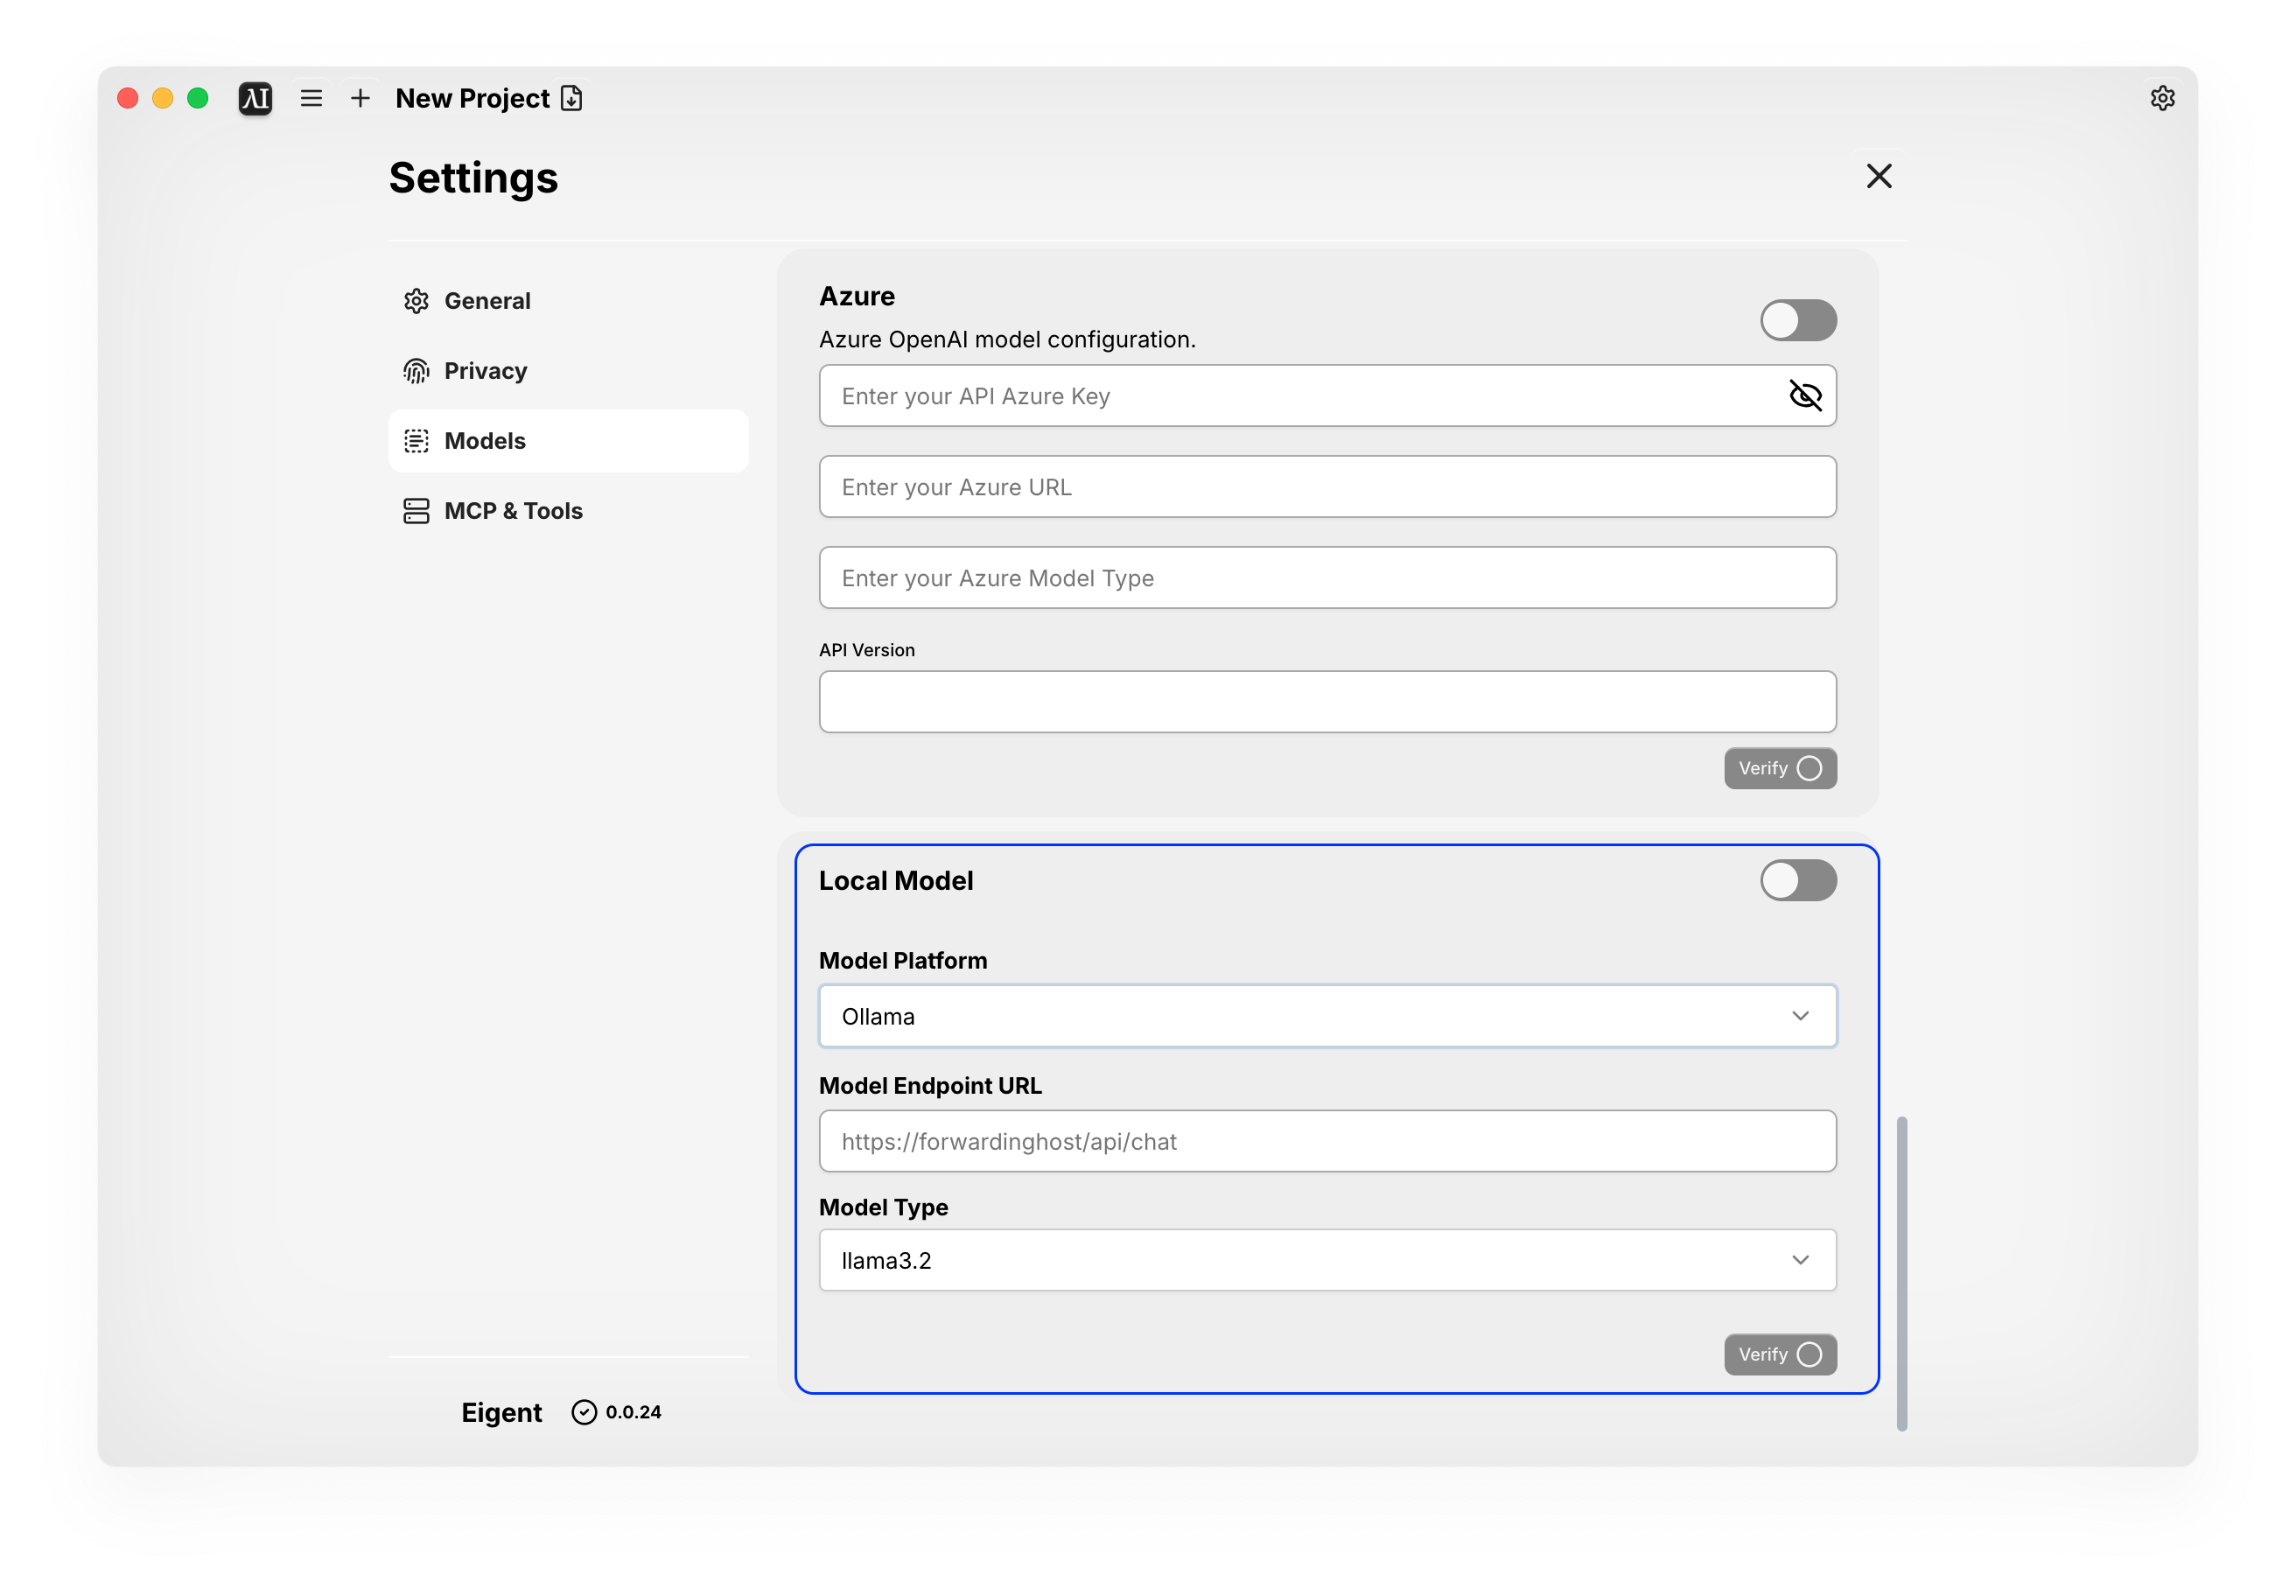
- Cloud Version: We provide pre-configured, state-of-the-art models, including GPT-4.1, GPT-4.1 mini and Gemini 2.5 Pro. Using these models is the easiest way to get started and will be billed to your account based on usage (credits).
- Self-hosted Version: You can connect your own models.
- Cloud Models: Connect your personal accounts from providers like OpenAI, Anthropic, Qwen, Deepseek and Azure by entering your own API key.
- Local Models: For advanced users, you can run models locally using Ollama, vLLM, or SGLang.
MCP Servers
MCPs are the tools that give your agents their skills. We’ve pre-configured popular tools like Slack, Notion, Google Calendar, GitHub, and more in MCP Market, which you can install for your agents with a single click.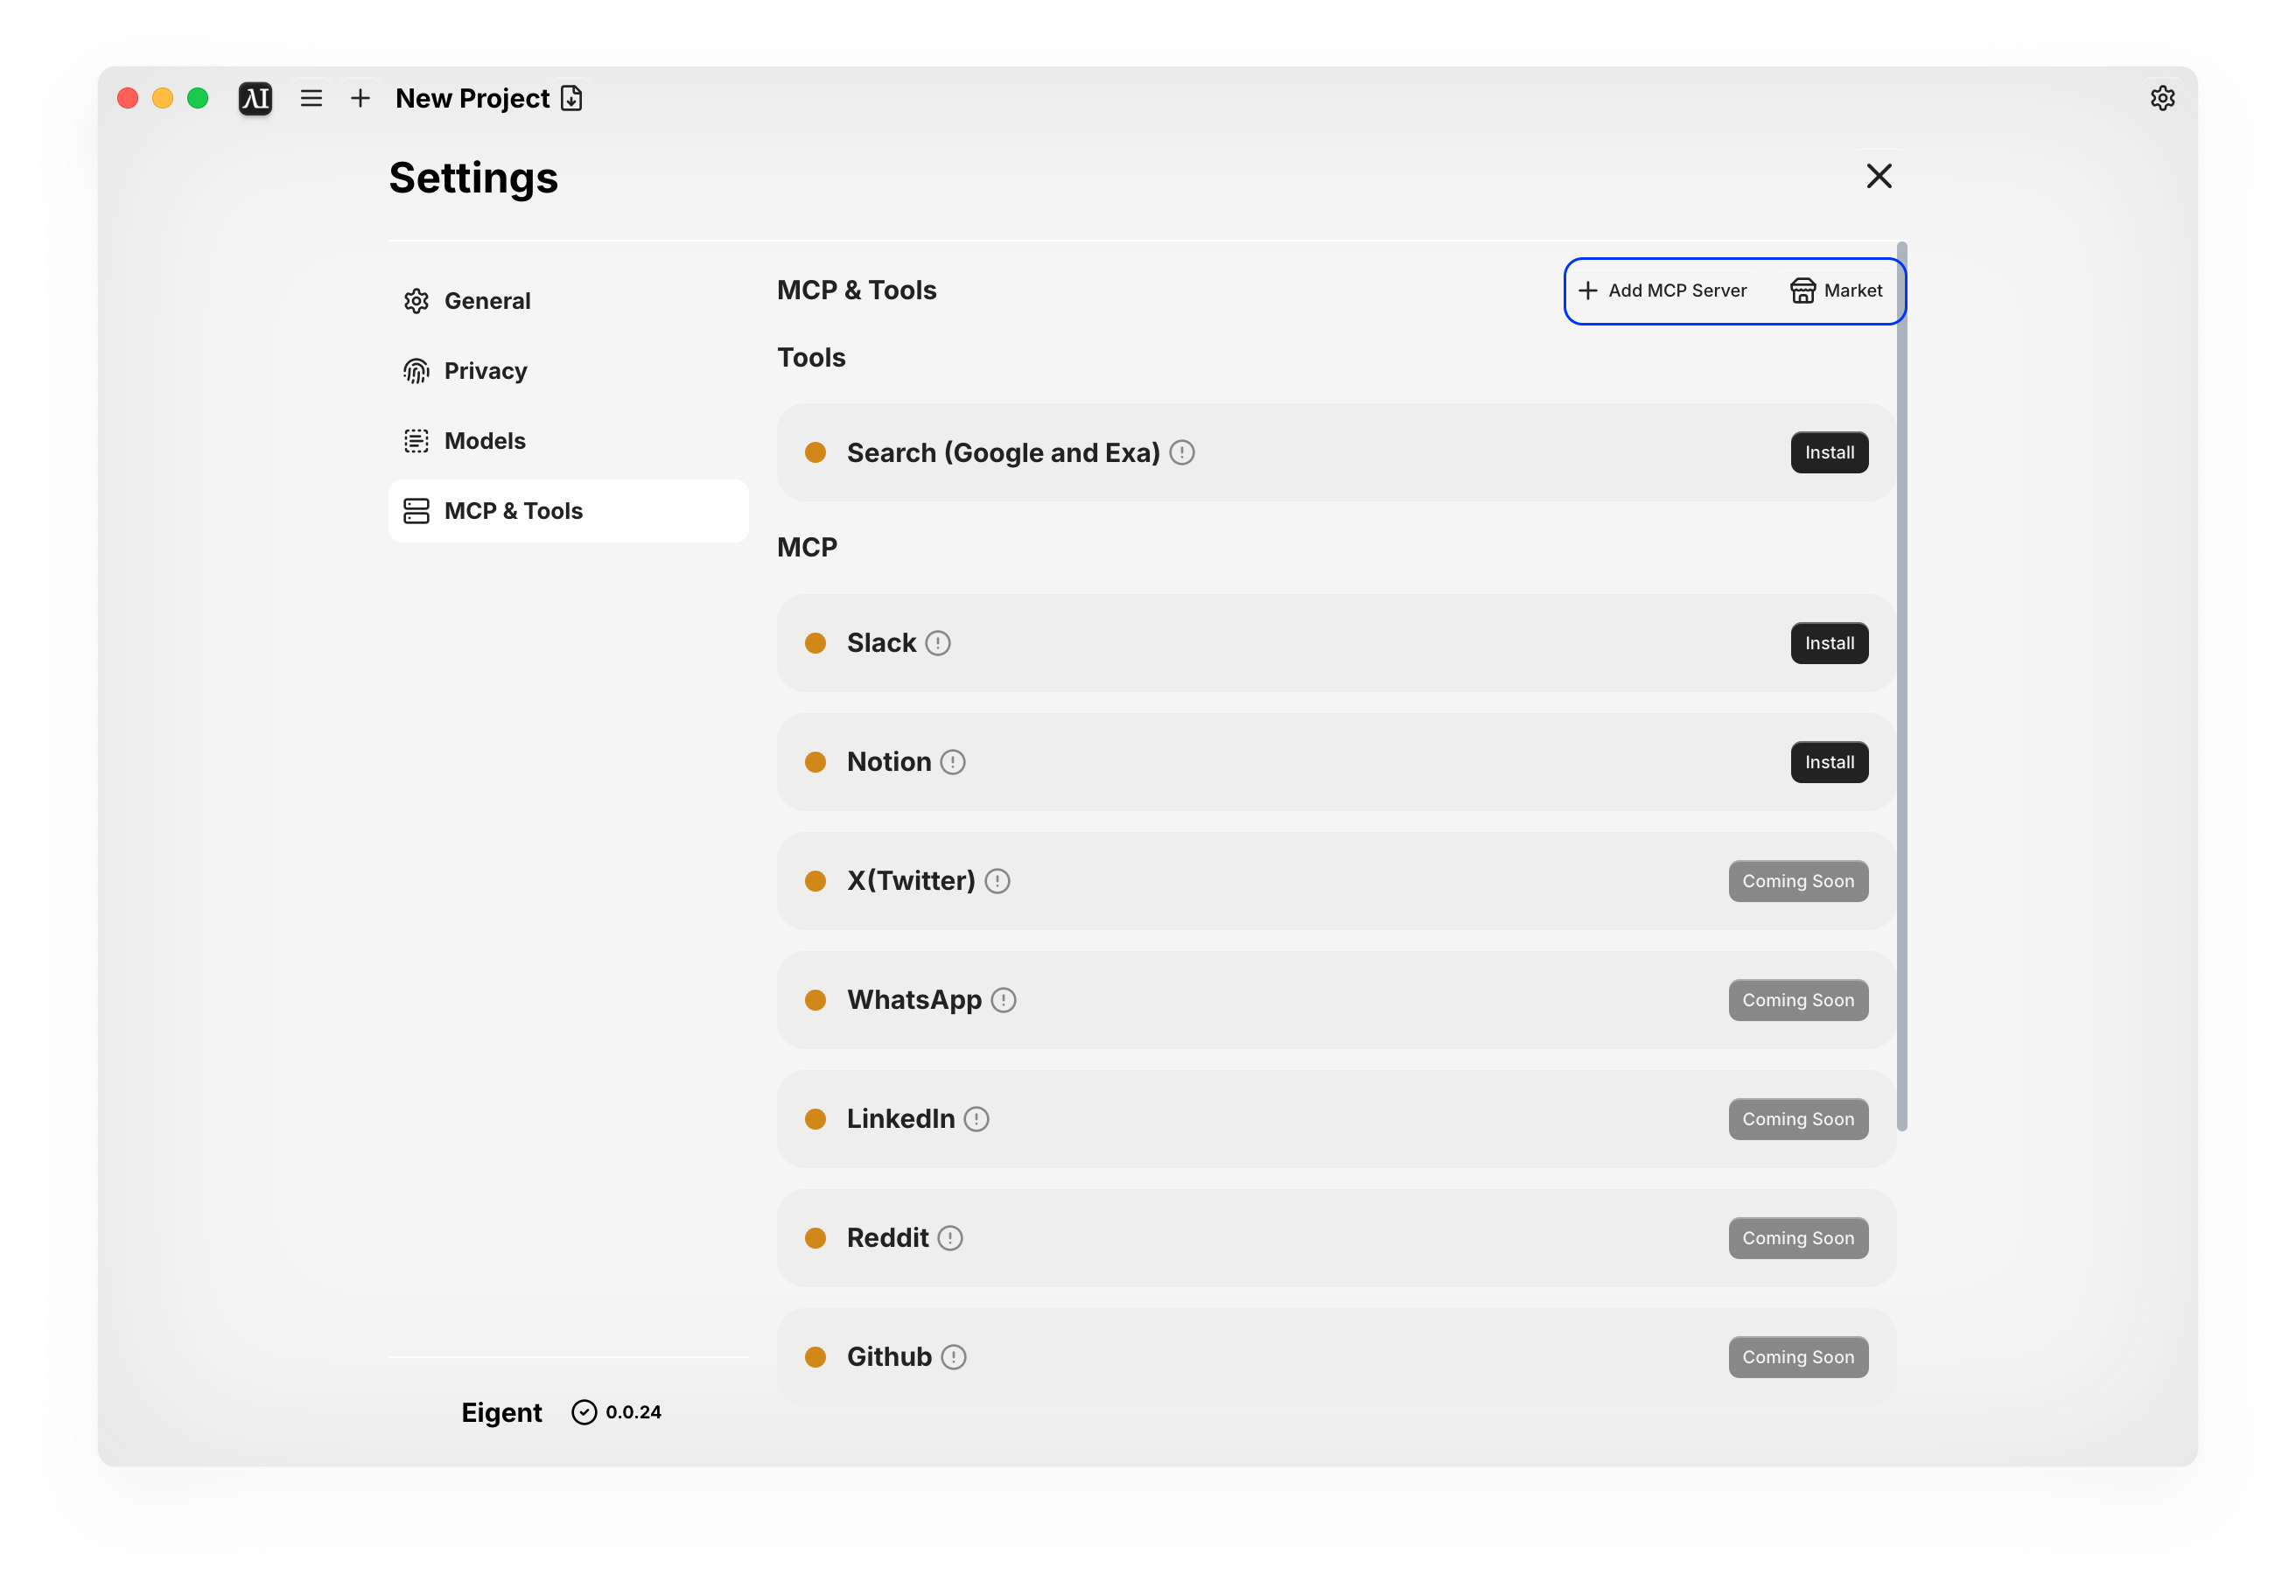 For advanced users, you can click Add MCP Server to configure and install custom tools from third-party sources.
